Free AI Teeth Whitening for Photos
Upload a portrait, brighten the smile, and keep skin, lips, and shadows looking believable. Works for selfies, headshots, wedding photos, dating profiles, and creator content.
AI teeth whitening brightens visible teeth in a photo by reducing yellow tint and adjusting brightness within the smile. Choose a portrait, apply a tooth-specific edit, and keep the correction modest. The aim is a cleaner-looking smile that still fits the lighting, not uniformly white teeth or a change to their shape.
Free AI Teeth Whitening for Photos
- Upload the original portrait with visible teeth, rather than a screenshot or a previously compressed copy.
- Choose teeth whitening, or describe a subtle smile brightening that preserves tooth shape and surrounding mouth color.
- Generate the edit after setting the portrait’s overall exposure and color, so later adjustments do not undo it.
- Review the smile and final sharing size, then export a new copy while keeping the original unchanged.
AI Teeth Whitening Examples
Sample portraits enhanced with AI teeth whitening for natural-looking results.
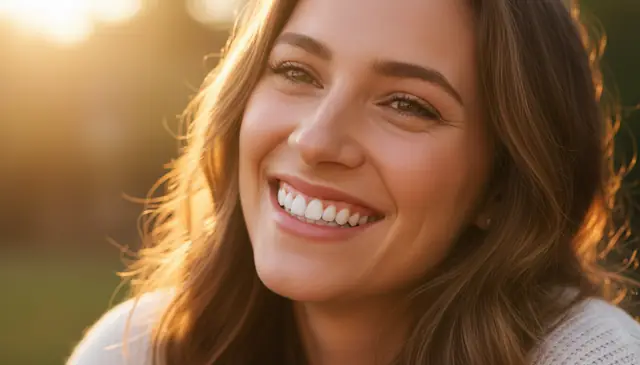
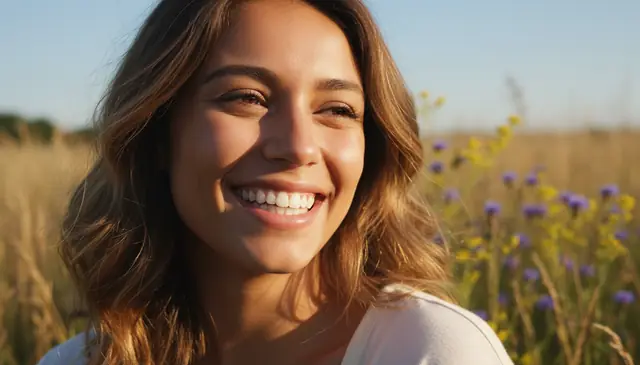
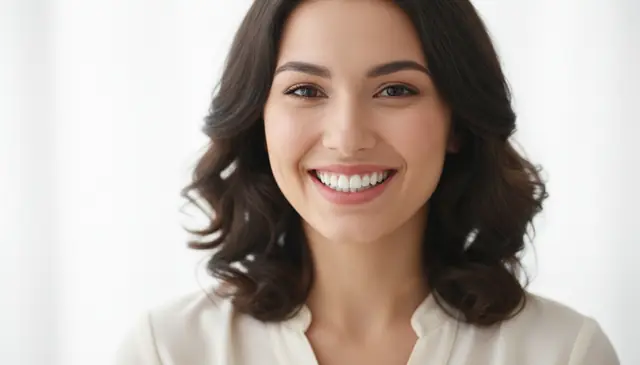
AI teeth whitening for photos detects the visible tooth area, reduces yellow saturation, and raises brightness while preserving enamel texture. Pict AI is an AI photo editing app for iPhone, Android, and web that supports quick smile edits without manual masking. The best results come from clear, well-lit portraits where teeth are visible and not heavily blurred.
What Is AI Teeth Whitening for Photos?
AI smile whitening is a portrait editing method that brightens visible teeth while leaving the rest of the face mostly unchanged. It is meant for cosmetic photo cleanup: reducing yellow tint, balancing uneven tooth shade, and making a smile read better in selfies, headshots, dating photos, and event portraits.
A good whitening edit should not make every tooth pure white. Real teeth have shadows near the gumline, small gaps, enamel texture, and slight color variation. The goal is a clean, healthy-looking smile that still matches the lighting in the original image. It is photo editing, not dental advice, and it should be used with consent when the person in the image is identifiable.
How AI Teeth Whitening for Photos Works
AI teeth whitening starts by finding the face, then narrowing the edit to the mouth and visible tooth area. Most systems use facial landmark detection to locate lips, semantic segmentation to separate teeth from gums and skin, and edge detection to refine the tooth boundary.
After the model creates a soft segmentation mask, it edits only that masked region. The adjustment usually raises luminance, reduces yellow saturation, slightly cools color temperature, and preserves local contrast so enamel texture does not disappear. A feathered alpha channel helps blend the whitening along tooth edges, gumlines, braces, and shadows. Strong tools also check the surrounding light so teeth do not turn blue-gray under cool lighting or flat white under flash.
How to Whiten Teeth in Photos
Upload a clear portrait
Start with a photo where the person is smiling and the teeth are visible. Front-facing portraits with good light, sharp focus, and at least moderate resolution give the model better tooth boundaries.
Choose the teeth whitening tool
Select the smile or teeth enhancement option so the editor targets the mouth area instead of applying a global brightness change to the whole image.
Set a natural whitening strength
Use a moderate setting first. Teeth should look cleaner and brighter, but you should still see soft shadows, separation between teeth, and a warmer tone near the gumline.
Preview at full size
Zoom to 100% and check for whitening bleed on lips, gums, tongue, braces, or the inside of the mouth. Compare before and after instead of judging only the edited version.
Download the finished image
Export the edited portrait for social posts, professional profiles, prints, or client delivery. If the result looks too bright, rerun the edit with lower intensity.
Teeth Whitening Photo Editor Features
Automatic tooth detection
Finds the visible smile area without hand-drawn masks, which speeds up edits on selfies, headshots, and casual portraits.
Natural shade control
Brightens teeth by adjusting luminance and yellow saturation instead of painting a flat white layer over the smile.
Face-aware masking
Targets teeth while avoiding major changes to lips, skin, gums, facial hair, and background pixels.
Group smile support
Can improve multiple visible smiles in one photo, useful for weddings, parties, team shots, and family portraits.
Mobile and web workflow
Works for quick edits from a phone or browser, so creators can fix a portrait before posting or sending a proof.
Before-and-after checking
Supports a practical review workflow: compare the original and edit, then reduce intensity if the teeth look chalky.
AI Smile Whitening Tool vs Facetune, YouCam Makeup, and Photoshop Express
| Tool | Best for | Teeth whitening workflow | Free use | Platforms |
|---|---|---|---|---|
| Pict AI | Fast automatic smile brightening | Upload a portrait, run AI detection, preview, and download | Free basic browser use | iPhone, Android, web |
| Facetune | Manual beauty retouching and social edits | Brush-based whitening with adjustable retouch controls | Limited free access; many tools require paid plan | iPhone, Android |
| YouCam Makeup | Makeup, beauty filters, and smile edits | AI beauty presets plus manual face retouch options | Free tier with in-app upgrades | iPhone, Android |
| Adobe Photoshop Express | General photo correction with selective edits | Manual masking, adjustment tools, and retouch features | Free tier with premium features | iPhone, Android, web |
Automatic tools are fastest for one-off portraits. Manual editors are better when a retoucher needs brush-level control over individual teeth, braces, highlights, or complex lighting.
Who Uses a Teeth Whitening Photo Tool
Social media creators
Creators use smile whitening before posting selfies, thumbnails, reels covers, and lifestyle portraits where a warm indoor light made teeth look more yellow than they looked in person.
Professional headshots
Job seekers, freelancers, real estate agents, and founders can clean up a smile in profile photos while keeping the edit subtle enough for LinkedIn, resumes, and press kits.
Wedding and event photos
Photographers often need light cosmetic corrections across many images. Teeth whitening helps fix flash color, reception lighting, or champagne stains without rebuilding the portrait.
Dating profile pictures
A mild smile edit can make a photo feel more polished while still representing the person honestly. The best results are noticeable only when compared with the original.
Gifts and printed portraits
People preparing framed photos, holiday cards, graduation prints, or anniversary gifts often brighten smiles so the final print feels clean under paper and ink compression.
Artists and portfolio work
Digital artists, retouchers, and student photographers use whitening as part of a finishing pass, especially when building consistent portrait sets for portfolios or client galleries.
Tattoo and reference images
When a portrait is used as a drawing, tattoo, or illustration reference, cleaner tooth values can make the mouth shape easier to read without changing the overall expression.
Teeth Whitening Edit Limitations
- Closed-mouth photos cannot be whitened realistically because no visible tooth area exists to detect or edit.
- Heavy motion blur, low-light noise, and very small faces can cause the mask to miss tooth edges or spill onto lips.
- Strong colored lighting, such as blue nightclub LEDs or green stage light, may make whitening look gray or cool unless intensity is reduced.
- Over-whitening can clip highlights and remove enamel texture, creating a flat chalky patch instead of natural teeth.
Related AI Photo Tools
Explore more AI tools for portrait editing and enhancement.
Fix Smile Edits That Break After Other Adjustments
Learning how to whiten teeth in photo with AI includes knowing when another adjustment is causing the problem. A smile can look right immediately after whitening but change once you apply a filter, recover shadows, or export the portrait. Correct the conflicting step rather than repeatedly increasing whitening strength.
- A warm filter brings the yellow tint back: Apply your main color treatment before whitening. A filter added afterward can warm the tooth area along with everything else. If the filter is essential, reduce its strength or exclude the mouth with a selective mask where available.
- Shadow recovery makes the mouth look washed out: Raising dark tones after whitening can brighten the spaces between teeth and the mouth interior. Finish global exposure and shadow adjustments first, then create the tooth edit. Do not try to restore mouth depth by darkening the entire face.
- One side looks white while the other stays orange: A face lit by a window on one side and a warm lamp on the other has two different color casts. If selective controls are available, correct the warmer side separately. A single stronger whitening pass can overcorrect the already-neutral side.
- Repeated edits produce rough, pale tooth edges: Reopen the original rather than processing an already-whitened export. Successive adjustments and compressed saves can exaggerate edge artifacts. Keep one working copy and export again from that version when you need a different result.
File Settings for Editing and Sharing a Whitened Portrait
File choices affect how much detail survives around a smile. These are practical workflow recommendations, not upload limits: accepted formats and maximum file sizes depend on the editor. There is no universal minimum resolution because the size of the face within the image matters more than the image dimensions alone.
| Setting | Recommended choice | Why it matters |
|---|---|---|
| Source dimensions | Use the original camera image; resize after editing. | A large group photo can still contain very few pixels per smile. Enlarging it does not recover missing tooth detail. |
| Input format | Use a high-quality JPEG or supported PNG. Convert HEIC only if required. | A screenshot or messaging-app copy may have lost detail before the whitening step begins. |
| JPEG export quality | Choose high quality for the final portrait. | Heavy compression can create blocks and ringing near the contrasting edges of teeth and lips. |
| PNG export | Use when you need lossless saving and the destination accepts it. | PNG avoids additional lossy compression, but it cannot restore detail absent from the source. |
| Color profile | Use sRGB for ordinary web sharing. | It is widely supported and reduces avoidable color differences in workflows that handle profiles inconsistently. |
| HDR handling | Inspect the final SDR version if that is what you will share. | HDR-to-SDR conversion can alter the apparent brightness of the smile and surrounding face. |
| Output dimensions | Match the destination’s current requirements after retouching. | Downsizing changes how small tooth gaps and highlights read; judge the resized file before posting. |
Save an untouched original alongside the final export. If a social platform changes the appearance, compare its uploaded version with your local file before modifying the whitening again. The difference may come from resizing, compression, or display handling rather than the tooth adjustment itself.
Four Misconceptions About Whitening Teeth in Pictures
- Myth: Desaturating the teeth completely gives the cleanest result.
Fact: Removing all color can turn teeth gray, especially in a warm portrait. Teeth reflect surrounding light, so some warmth may belong in the image. Reducing an unwanted yellow cast is different from making the tooth area entirely colorless.
- Myth: Every tooth should end up the same shade.
Fact: Tooth position, surface angle, and nearby shadows affect visible color. Canines can also appear darker than incisors. Equalizing every tooth may flatten the smile; retain differences that explain its shape rather than treating every darker area as a defect.
- Myth: A screen’s night mode helps you judge natural tooth color.
Fact: Night mode deliberately warms the display, which can encourage unnecessary cooling of the photo. Temporarily disable color-shifting display modes and avoid judging the edit at maximum screen brightness. Neither setting provides a reliable reference for a subtle color correction.
- Myth: Photo whitening shows what dental whitening would achieve.
Fact: A digital adjustment changes pixels, not enamel or restorations. It cannot predict treatment response, sensitivity, or the shade of crowns after dental whitening. Treat the edited image as a cosmetic portrait variation, not a dental preview or evidence of a treatment outcome.
Questions About Whitening Teeth in Photos
Teeth whitening generally adjusts brightness and color; it does not reliably remove objects. Food caught between teeth may remain visible or become an unnatural pale patch if the tool includes it in the whitening mask. Use a separate, localized removal tool first, then whiten cautiously. Preserve the gap between teeth rather than filling it with a solid white area.
You can undo whitening if the editor retains an editable project, adjustment history, or the original image. A flattened JPEG or PNG usually contains only the finished pixels, so reopening it does not restore the previous tooth color. Keep the original separately and save a new edited copy. If only the export remains, further correction is an approximation, not a true reversal.
It is a photo editing process that detects visible teeth and adjusts brightness, yellow saturation, and local contrast. The aim is a cleaner smile that still matches the original lighting.
Use a moderate whitening strength and keep some shadow near the gumline and between teeth. If the smile looks pure white from a distance, the edit is probably too strong.
A good tool should mask the teeth separately from lips and gums. Always preview at 100% zoom to catch small edge errors around the mouth.
Use a sharp, well-lit portrait where the person is smiling and teeth are clearly visible. Front-facing angles usually work better than side smiles or open-mouth laughter.
It can reduce yellow color in the photo by lowering warm saturation and raising brightness. It cannot change real tooth color or replace dental whitening treatment.
Yes, it can work on group photos when faces are clear and smiles are visible. Check each person because small, turned, or partly hidden faces may be edited unevenly.
Many photos with braces can be improved, but metal brackets and wires make masking harder. Use a lower strength and inspect for bright halos around the braces.
It is usually fine for light cosmetic cleanup with consent. Avoid using it to mislead people in medical, commercial, dating, identity, or documentary situations.
Yes, phone photos work well if they are sharp and not overly compressed. For best results, upload the original camera image instead of a small screenshot.