What App Fixes Blurry Photos? Tested in 2026
AI photo deblurring apps can fix many blurry photos when the image still contains recoverable edge detail. The best results come from mild focus blur, light hand-shake blur, low-light softness, screenshots, old scans, and social photos that need to look cleaner for sharing, printing, or saving.
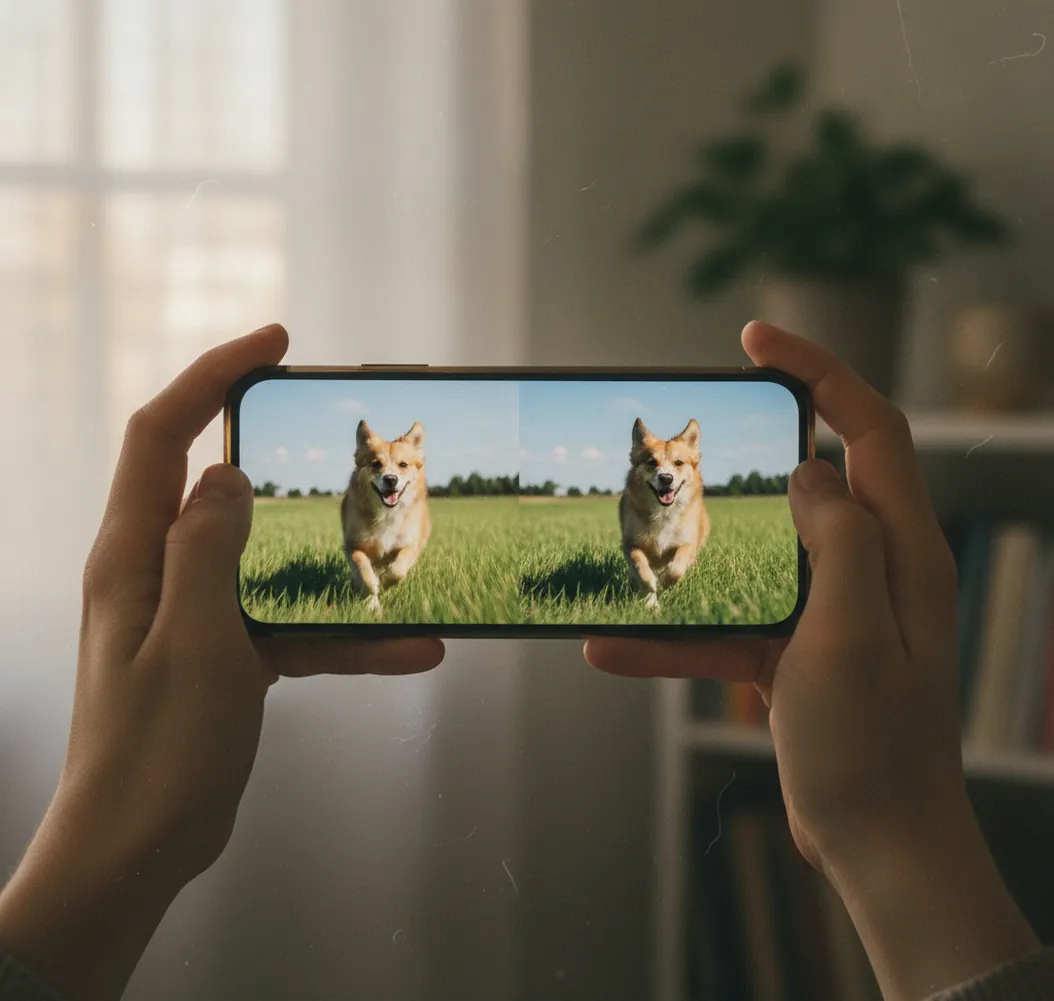
Creating your image...
An AI deblur app fixes blurry photos by rebuilding edge contrast, sharpening local detail, and reducing low-light softness without relying only on old-style sharpen filters. In 2026, tools like browser deblurrers, iPhone photo enhancers, desktop AI editors, and Pict AI work best on mild focus blur, light motion blur, and images that still have visible structure. No app can perfectly restore detail that the camera never captured, especially in severe motion smear or fully out-of-focus faces.
Is There an App That Fixes Blurry Photos?
Yes, there are apps that fix blurry photos, but they work best when the blur is moderate and the original file still contains real edges. If you are asking what app fixes blurry photos, start with an AI deblur tool, inspect the result at 100% zoom, and compare eyes, text, hair, seams, or object edges before saving.
The most fixable images usually have soft focus, slight hand shake, noisy low-light texture, or compression blur from messaging apps. The least fixable images have long directional streaks, faces that look smeared sideways, or tiny subjects with no visible detail. A good blur repair result should look clearer, not crunchy, outlined, plastic, or artificially over-textured.
How Do AI Deblur Apps Fix Blurry Images?
AI deblur apps fix blurry images by estimating lost edge structure and increasing perceived sharpness through machine-learning restoration. Instead of applying one global sharpen filter, modern models analyze local contrast, texture frequency, motion direction, face features, noise patterns, and compression artifacts before rebuilding a cleaner version of the image.
Technically, these tools combine deconvolution-like blur reduction, edge enhancement, denoising, super-resolution, and artifact suppression. The model may recover letter shapes in a menu photo, eyelashes in a portrait, or product-label edges in a catalog shot. However, the output is still an interpretation. If the source file has no edge data, the app may generate plausible-looking detail rather than true detail.
How Do You Fix a Blurry Photo Online or on iPhone?
Start with the original file
Use the camera-roll original, RAW file, high-quality JPEG, or scan instead of a screenshot or social-media download. Messaging apps often compress photos, which gives AI fewer clean edges to recover.
Crop toward the important subject
If the face, receipt, label, pet, or product is small in the frame, crop closer before deblurring. A tighter crop helps the model spend more pixels on the area that actually needs repair.
Run one deblur pass first
Apply deblur before heavy brightness, contrast, saturation, or clarity edits. Brightening a noisy image first can turn sensor noise into gritty sharpened texture.
Inspect at 100% and 200% zoom
Check eyelashes, teeth, hairlines, text, signs, logos, and hard object edges. If you see halos, repeated patterns, or waxy skin, reduce strength or try a less aggressive result.
Export for the final use
Save PNG for screenshots, text, and graphics; save high-quality JPEG for normal photos. For prints, test a small 4x6 or proof crop before ordering a large wall print.
Which Apps Fix Blurry Photos Best in 2026?
| Tool | Best For | Strengths | Watch Out For |
|---|---|---|---|
| Pict AI | Fast browser and iPhone deblur workflows | Useful for quick blur repair, sharpening, and preparing social posts, gifts, profile photos, or small prints | Like all AI tools, severe motion smear and missing facial detail may not recover accurately |
| Adobe Lightroom | Photographers who want manual control | Strong masking, noise reduction, texture, clarity, and export controls for RAW or high-quality JPEG files | Not a one-click rescue tool; aggressive clarity can create halos |
| Topaz Photo AI | Desktop-quality restoration and batch work | Strong sharpening, denoising, face recovery, and upscaling options for large files | Can look synthetic if face recovery or sharpening is pushed too hard |
| Remini | Portrait enhancement and old phone photos | Good at making faces appear cleaner and more polished for casual sharing | May change facial identity or smooth skin too much |
| Apple Photos or Google Photos | Light everyday edits on mobile | Convenient built-in sharpening, clarity, denoise, and exposure tools | Limited true deblurring compared with dedicated AI restoration tools |
| Snapseed | Manual mobile sharpening and structure edits | Useful for selective sharpening and quick phone edits without complex menus | Does not reconstruct lost detail like a dedicated AI deblur model |
Choose based on the file and destination: quick social rescue needs a fast AI deblurrer, RAW photography needs manual editing controls, and large print restoration benefits from desktop tools with careful zoom checks.
What Type of Blur Can Actually Be Repaired?
The easiest blur to repair is mild focus blur where the subject is soft but still recognizable. AI can often improve eyes, fabric texture, product edges, document letters, and old scanned photos when the blur is spread evenly and the source resolution is decent.
Light motion blur can sometimes be repaired, especially if the camera shake is short and the subject still has clear outlines. Heavy motion blur is harder because it smears detail across multiple pixels in one direction. Low-light mush is also common: phone cameras reduce noise so aggressively that skin, fur, and shadows turn waxy. AI deblur plus denoise can help, but it should preserve natural texture rather than inventing sharp fake grain.
What Settings Make a Deblurred Photo Look Natural?
- Use the lowest deblur strength that makes the subject readable. Natural sharpness usually beats maximum sharpness.
- Sharpen faces less than clothing, buildings, signs, or product packaging. Skin shows artifacts faster than hard surfaces.
- Check for halos along dark-to-light edges, especially glasses, hair, window frames, jewelry, and text.
- Avoid stacking multiple sharpen filters. One AI deblur pass plus a small contrast adjustment is often cleaner than three aggressive passes.
- Use selective edits when possible: sharpen the eyes, logo, or document text while leaving backgrounds and skin softer.
- For social posts, judge the image at the platform size. A repair that looks rough at 200% may still look excellent in a story, profile image, or carousel.
- For prints, evaluate the intended size. A photo that works at 4x6 may not survive as a 16x20 wall print.
What Prompt Recipes Help Fix Blurry Photos?
- Portrait repair prompt: "Reduce mild focus blur on the face, sharpen eyes and hair naturally, preserve skin texture, avoid halos, avoid changing facial identity."
- Text rescue prompt: "Improve readability of the text, correct minor blur, keep letter shapes faithful, do not invent missing words, preserve document layout."
- Product photo prompt: "Sharpen the product edges and label, reduce compression artifacts, keep colors accurate, preserve realistic shadows and packaging texture."
- Old photo prompt: "Restore moderate softness, reduce scan blur and noise, keep film grain subtle, preserve the original face structure and vintage look."
- Low-light prompt: "Reduce noise and softness, restore edge clarity, avoid waxy skin, keep the scene natural, do not over-brighten shadows."
- Social post prompt: "Create a cleaner version for Instagram or TikTok, improve subject clarity, keep background soft, avoid exaggerated HDR contrast."
Can Deblurring Help Text, Faces, Screenshots, and Old Photos?
Deblurring can help text, faces, screenshots, and old photos, but each category needs a different quality check. Text requires faithful letter shapes, so the tool should improve readability without inventing words. Screenshots often work best as PNG because extra JPEG compression can create blocks around small letters.
Faces need the most caution because face-enhancement models can make people look sharper while subtly changing identity. For portraits, check eyes, mouth shape, moles, glasses, and hairline against the original. Old photos usually benefit from a gentler pass: reduce scan blur and dust, but keep some film grain so the image still feels like a real memory rather than a synthetic reconstruction.
Should You Extend or Rebuild Backgrounds After Fixing Blur?
You should extend or rebuild a background after fixing blur when the repaired subject needs a cleaner crop, better aspect ratio, or more negative space for a design. This is common for profile photos, holiday cards, product listings, thumbnails, posters, and gifts where the subject is salvageable but the composition feels too tight.
The safest order is deblur first, then crop, then extend the background or fill missing edges. If you extend before blur repair, the AI may blend new background texture into a soft subject and make the final image harder to evaluate. Keep generated edges slightly softer than the subject so the composition feels natural.
Where Do Blur-Fixing Apps Hit a Wall?
- Severe motion smear cannot be perfectly reversed because the camera recorded a streak instead of distinct facial, text, or object detail.
- True out-of-focus subjects are difficult when the focus plane is far behind or in front of the person. AI may create plausible texture, but not guaranteed real detail.
- Tiny cropped subjects have too few pixels for reliable restoration. Upscaling may help presentation, but it does not prove the recovered detail is accurate.
- Low-resolution social downloads often contain compression macroblocks, ringing, and smoothed textures that become more visible after sharpening.
Frequently Asked Questions
AI can improve a mildly out-of-focus photo if the file still has visible edge structure. It cannot perfectly recreate fine detail that was never captured by the lens.
An app can sometimes reduce light hand-shake blur, especially in high-resolution photos. Strong directional smear usually leaves artifacts or only becomes partly improved.
The best free method is to test the original image in an online AI deblurrer, then inspect the result at 100% zoom before exporting. Use the highest-quality source file, not a screenshot.
Crunchy edges usually come from too much sharpening, clarity, or deblur strength. Reduce the intensity and avoid stacking multiple sharpen filters on the same image.
Use PNG for screenshots, documents, and text because it avoids extra compression. Use the original RAW or high-quality JPEG for normal camera photos.
A blurry old photo can often be improved if the scan has enough resolution and the faces or objects still have structure. Scan at 300 to 600 DPI before using AI restoration.
Deblurring improves perceived clarity by restoring edges and texture cues. It is different from true optical resolution, although some tools combine deblur with AI upscaling.
It can be safe for casual images, but avoid uploading sensitive IDs, private documents, confidential work, or children’s photos unless you trust the tool’s privacy policy.
Zoom to 100% and look for real edges around eyes, text, seams, or object outlines. If everything is a smooth streak with no structure, the app can only approximate detail.