App to Turn Photos Into Sketches for iOS and Android
An app to turn photos into sketches converts a real photo into a pencil, ink, or charcoal-style drawing by detecting edges, shadows, and texture. The best results come from sharp, well-lit images with simple backgrounds and enough facial or object detail for clean linework. Pict AI, Prisma, Canva, and similar editors can all create sketch-style images on a phone, but they differ in style strength, export workflow, and design features.
An app to turn photos into sketches applies pencil-style lines and shading to an uploaded image. Pict.AI, Prisma, and other mobile editors offer drawing-like treatments, but the right choice depends on whether you want faithful outlines or a more stylized illustration. Look for adjustable effect strength, suitable export dimensions, and a result that preserves the details you care about.
App to Turn Photos Into Sketches for iOS and Android
- Upload your original photograph and select a crop that keeps the subject’s defining features visible.
- Choose a pencil preset or describe the desired line weight, shading, and background treatment.
- Generate the sketch, then adjust effect strength if outlines overwhelm the subject’s natural features.
- Review the saved image at full size and export in a format suited to its destination.
Example prompt: Convert this photo into a clean graphite pencil sketch with visible paper texture, thin facial outlines, soft cheek shading, and minimal background lines; keep eyes and hairline sharp, avoid heavy black fill.
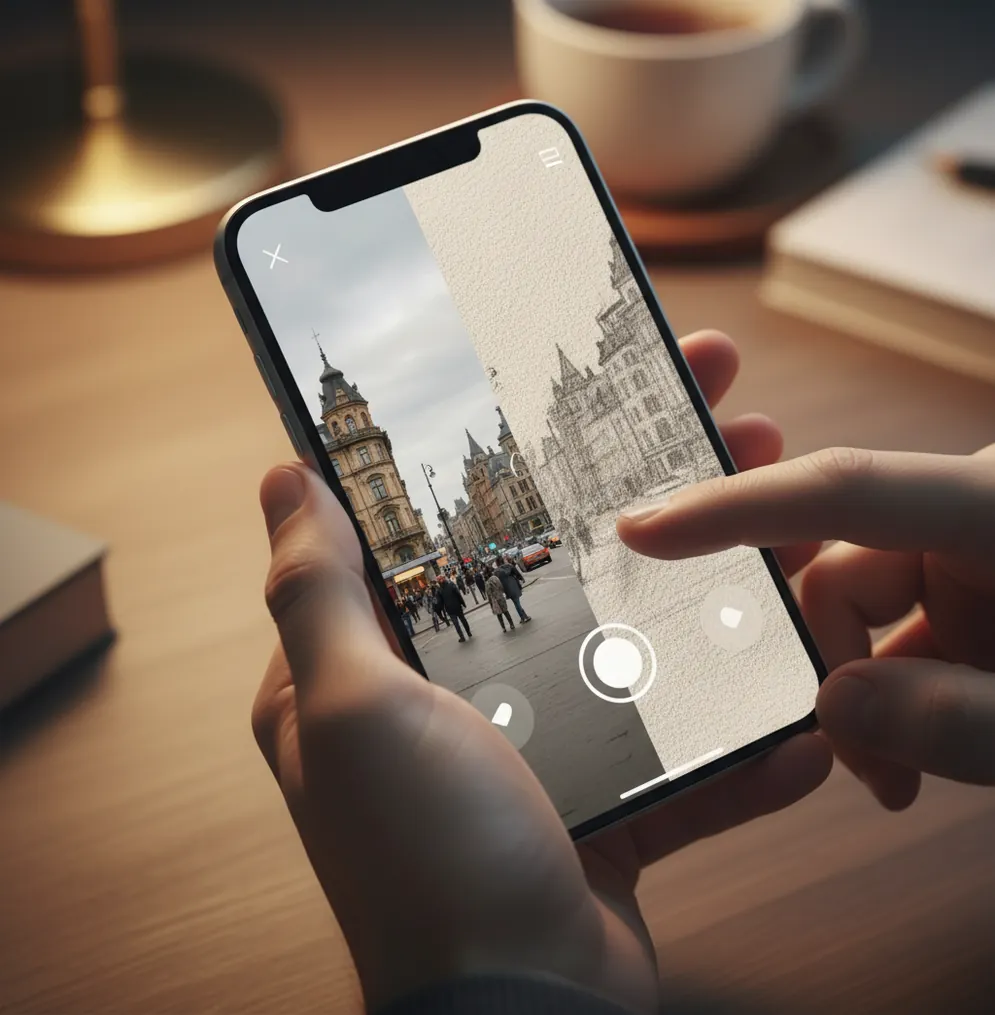
An app to turn photos into sketches is a mobile photo editor that transforms a real image into pencil, ink, charcoal, or line-art style artwork. It works by detecting edges and tonal contrast, then rebuilding the photo with simulated strokes, shading, and paper-like texture. For best results, use a sharp photo, avoid busy backgrounds, and lower the effect strength if faces or fine details look distorted.
What Is an App to Turn Photos Into Sketches?
An app to turn photos into sketches is a photo editor that converts a camera image into a drawing-like result, usually in pencil, pen-and-ink, charcoal, graphite, or contour-line style. Instead of manually tracing the photo, the app analyzes edges, brightness gradients, facial structure, fabric texture, and background contrast, then renders the image with artificial strokes and shading.
These apps are useful when you want a portrait to feel more artistic, turn a pet photo into a gift print, create social profile art, mock up a tattoo idea, or make a product image look like a hand-drawn catalog illustration. The quality depends less on the app alone and more on the input photo: clear focus, visible subject edges, and soft but directional lighting usually produce the most believable sketch effect.
How Do Photo-to-Sketch Apps Work?
Photo-to-sketch apps work by separating a photo into visual features such as edges, gradients, shadows, highlights, and texture zones. Traditional filters may use edge detection, contrast mapping, desaturation, and thresholding to make outlines appear like graphite or ink. More advanced editors use neural style transfer or image-to-image diffusion models to predict where strokes should be thin, dense, soft, or broken.
A good sketch conversion does more than turn a photo gray. It preserves important identity cues like eye shape, hairline, jaw contour, pet whiskers, product silhouette, or clothing folds while simplifying visual noise. That balance is why intensity controls matter: too little effect looks like a gray photo, while too much can turn noses, teeth, fur, and text into harsh artifacts.
How Do You Turn a Photo Into a Pencil Sketch on Your Phone?
Choose a sharp source photo
Start with a high-resolution image where the main subject is in focus. Portraits work best when the eyes are crisp, the face is not heavily shadowed, and the background does not compete with hair or skin edges.
Crop before applying the sketch effect
Crop to the final format first, such as 1:1 for profile images, 4:5 for social posts, or 8x10 for prints. This helps the app prioritize the subject instead of wasting detail on unnecessary background space.
Apply a pencil, ink, or charcoal style
Test at least two sketch looks because each style handles detail differently. Pencil usually preserves soft shading, ink creates stronger outlines, and charcoal can make portraits feel dramatic but may exaggerate shadows.
Lower the strength until features look natural
Reduce intensity if eyebrows become blocks, teeth turn dark, skin looks dirty, or fur becomes noisy. A believable sketch often uses moderate linework with controlled shading rather than maximum effect strength.
Export and review at full size
Zoom in before saving a final version. Check eyelashes, lips, pet eyes, logos, jewelry, hands, and background edges, because small artifacts are easier to miss in a phone preview than in a print or profile upload.
Which Apps Are Best for Turning Photos Into Sketches?
| Tool | Best For | Sketch Style | Mobile Workflow | Watch For |
|---|---|---|---|---|
| Pict AI | Fast single-photo sketch edits on iOS and Android | Pencil, ink, and charcoal-style looks with quick previews | Simple import, preview, adjust, and export flow | Check export settings and terms for your specific use case |
| Prisma | Heavier art-style transformations | Painterly, graphic, and stylized sketch-like presets | Good for trying bold artistic variations | Some styles may overpower natural facial detail |
| Canva | Sketch edits inside social posts, flyers, and templates | Design-friendly effects combined with layouts and text | Strong if the sketch will be part of a larger design | Asset licensing and template settings can affect commercial use |
| Picsart | Casual edits, stickers, overlays, and social graphics | Filter-based sketch and drawing effects | Flexible for remixing images with other edits | Effects can look busy if combined with too many overlays |
Choose the tool based on the final output. For a clean portrait sketch, prioritize edge quality and intensity control; for a poster or invite, prioritize templates, typography, and export dimensions.
What Photos Work Best for Sketch Effects?
The best photos for sketch effects have one clear subject, strong but not harsh contrast, and visible edges around the most important details. A front-facing portrait with sharp eyes, a pet photo with catchlights, a product shot on a plain surface, or a travel image with clean architecture usually converts better than a dim selfie or a cluttered party photo.
For portraits, use soft window light or outdoor shade so the app can build smooth graphite-style shading across skin. For pets, make sure the eyes and nose are sharp because fur can easily become scribbly. For product sketches, place the object against a simple background so the outline reads like intentional line art rather than random crosshatching.
Where Can You Use Sketch-Style Photos?
- Profile pictures that feel more personal than a standard selfie but less formal than a studio portrait.
- Pet portraits for framed gifts, memorial prints, stickers, lock screens, or social posts.
- Wedding invitations, anniversary cards, and couple illustrations made from an existing photo.
- Album covers, playlist art, and musician promo graphics with a hand-drawn mood.
- Tattoo concept drafts where the goal is a rough visual direction, not final tattoo-ready linework.
- Product catalog images when you want a lightweight line-art look for packaging, menus, or lookbooks.
- Travel journals, scrapbook pages, and story graphics that turn ordinary phone shots into notebook-style illustrations.
- Art reference images for studying shadow shapes, facial planes, and composition before drawing manually.
What Prompt Recipes Make Sketch Edits Look More Hand-Drawn?
- Portrait pencil sketch: "Convert this portrait into a realistic graphite pencil sketch on white paper. Preserve the natural face shape, soft skin shading, eye detail, and hair texture. Use clean contour lines and avoid cartoon exaggeration."
- Pet charcoal sketch: "Turn this pet photo into a soft charcoal drawing with expressive eyes, visible fur direction, gentle smudged shading, and a plain paper background. Keep whiskers readable and avoid messy background lines."
- Ink line art: "Create a black-and-white pen-and-ink version of this image with crisp outlines, controlled hatching, and minimal shading. Keep the subject recognizable and simplify unnecessary background details."
- Gift print style: "Transform this photo into a polished pencil illustration suitable for an 8x10 print. Use balanced contrast, clean edges, subtle paper grain, and natural proportions. Do not distort the eyes, mouth, hands, or text."
- Product sketch: "Convert this product photo into a clean technical sketch with accurate silhouette, light contour shading, and minimal background. Keep straight edges crisp and preserve important labels only if they remain legible."
When Do Sketch Apps Get Photos Wrong?
- Busy backgrounds can become visual noise because the app detects every branch, brick, fabric fold, or shadow as a possible pencil line.
- Low-light photos often produce blotchy shading because compression noise and dark shadows are interpreted as texture.
- Soft-focus images create weak linework; if the eyes, product edge, or pet face is blurry, the sketch will usually look smudged.
- Teeth, glasses, fingers, jewelry, and logos can distort because small high-contrast shapes are difficult to simplify cleanly.
How Do You Make a Sketch Conversion Look More Realistic?
To make a sketch conversion look realistic, use restraint: realistic drawings usually have selective detail, not equal line density everywhere. Keep the strongest lines around the eyes, jaw, hair boundary, pet nose, product outline, or main silhouette, and let secondary areas stay softer. If the app has sliders, reduce strength, texture, clarity, or contrast until the image feels drawn instead of filtered.
For a print, export at the largest available size and inspect the file at 100 percent zoom. For social posts, test the sketch as a small thumbnail because over-detailed pencil texture can disappear on feeds. If the final image needs text, borders, or branding, generate the sketch first, then add typography afterward so letters stay sharp.
When a Sketch App Beats Tracing - and When It Does Not
The useful question behind “what app turns photos into sketches” is whether you need a drawing-like image or editable drawing instructions. A sketch app can produce the first quickly. It usually cannot supply the deliberate stroke order, separate paths, or construction lines that an illustrator would create.
Advantages
- Fast visual exploration: Make several interpretations of the same composition before committing to a drawing style. This is useful for choosing between sparse outlines and a densely shaded illustration.
- A consistent starting point: Applying one preset across a series can help portraits look related. Keep the crop and effect settings consistent, then adjust individual images only where necessary.
- Reversible experimentation: Save each result separately so you can compare alternatives without overwriting the photograph or losing an earlier version.
Drawbacks
- Limited editability: A flattened sketch image does not let you select and move individual pencil strokes. Correcting one line may require a brush editor or another generation.
- Upload considerations: Check whether processing happens locally or on a server, and review retention and deletion controls before uploading private portraits. Sketch conversion does not require removal of clothing; avoid services that redirect you toward sexualized edits.
Verdict: Choose an app for a finished visual treatment. Choose tracing or illustration software when individual lines must remain editable.
Build a Controlled Sketch Comparison Before Exporting
A useful comparison changes one variable at a time. Otherwise, a different crop, brighter preview, or smaller export can make one sketch appear better for reasons unrelated to its linework. Use this workflow when choosing between presets or editors.
- Create one reference file. Upload the same saved photograph to each editor rather than taking separate screenshots or downloading social-media copies. Tip: Give the file a clear name so every variation can be traced to the same source.
- Set a single visual target. Choose or describe one treatment, such as light graphite with an untextured white background, and use equivalent settings wherever available. Tip: Keep hairstyle changes separate; an ai hairstyle generator changes the subject, making it harder to judge whether the sketch preserved the original appearance.
- Generate a small comparison set. Save a restrained version and a stronger version from each tool, naming them by tool and setting. Tip: Compare matching image dimensions so a smaller file does not hide rough edges.
- Check areas that should stay blank. Inspect the white background, bright clothing, and forehead for unwanted gray patches or artificial paper grain. Tip: View the image against both a white and a medium-gray canvas to reveal faint marks.
- Export for the destination. Use PNG when preserving crisp outlines or actual transparency matters; a high-quality JPEG may be sufficient for a shaded portrait. Tip: Reopen the saved file, not just the app preview, to check compression and confirm that a supposedly transparent background is not solid white.
Match the Sketch Treatment to the Final Format
The strongest effect is not automatically the most useful one. Select a treatment that survives the size, background, and editing requirements of its destination.
- If the image will appear as a tiny avatar, simplify it. Favor a clear silhouette and a few defining marks over fine crosshatching. Check the actual thumbnail: details that look elegant at full size can merge into gray patches when reduced.
- If the sketch will sit on a colored layout, request a plain background. Export with transparency only if the editor supports it. Simulated paper texture becomes a visible rectangle when placed over another color, so remove or avoid that texture before designing the layout.
- If you are creating ai wallpapers for android, plan for interface elements. Leave quieter space around the clock and icons, and preview the image on the intended screen. Detailed hatching behind small labels can make them harder to read.
- If you searched for “how to turn photo into painting with ai,” choose a painting treatment instead. Pencil effects emphasize lines and tonal shading; watercolor or oil-style effects emphasize washes or painted marks. A sketch preset is not a substitute for those textures.
- If you want to turn photo into anime style, treat that as a separate transformation. Anime styling may reinterpret facial proportions, eyes, and hair. Keep a sketch-only version for comparison if recognizable likeness matters more than character design.
Photo-to-Sketch Questions Answered
Most photo-to-sketch apps export raster images, such as JPEG or PNG, rather than editable vector paths. A drawing-like appearance does not make a file vector artwork. If you need scalable outlines for a logo or cutting machine, use vector tracing afterward and clean up the paths. Shaded pencil textures generally do not translate neatly into simple vector shapes.
Yes, some editors can apply local sketch filters without sending the image to a server. Other apps require cloud processing, especially for generative transformations. Check the specific feature’s processing and privacy information rather than assuming the entire app works offline. An airplane-mode check can show whether an effect runs without a connection, but it does not establish the app’s full data-handling practices.
The best app depends on your goal: choose a fast sketch editor for portraits, a design app for posters and invites, or an art-filter app for heavier stylization. Look for clean edge handling, adjustable strength, high-resolution export, and mobile support.
Many mobile editors offer free sketch effects or limited previews, but export quality, watermark removal, and advanced styles may require a paid plan. Always check the final export screen before saving.
Use a sharp, well-lit photo, apply a pencil or ink effect, then reduce the effect strength until the main features stay natural. A simple background and clear subject outline make the result look more hand-drawn.
Faces look strange when the effect over-emphasizes shadows around the nose, mouth, teeth, or eyes. Lower the intensity, use a better-lit portrait, or choose a softer pencil style instead of harsh ink.
They can be, as long as you export at high resolution and inspect the image before printing. For framed gifts, avoid over-processed textures and choose a clean sketch with readable facial or pet details.
A sketch app can help create a tattoo concept, but it should not be treated as final tattoo-ready artwork. A tattoo artist usually needs to redraw the design with proper line weight, placement, and skin readability.
Noisy sketch results usually come from low light, compression, cluttered backgrounds, or fine repeated patterns. Try a brighter source photo, crop closer to the subject, and reduce texture or contrast strength.