Best AI Photo Enhancer App in 2026
The best ai photo enhancer app in 2026 improves sharpness, reduces noise, fixes dull lighting, and upscales resolution while keeping faces and edges believable. Look for natural skin texture, clean hair detail, fast exports, and a workflow that lets you compare the result at 100% zoom before sharing, printing, or posting.
The best AI photo enhancer app depends on what you need to fix: a noisy portrait, a faded scan, or an image too small for printing. Choose a tool that preserves important features and exports the dimensions you need. Prioritize adjustable restoration for faces, controlled noise reduction for camera photos, and predictable enlargement for print work.
Best AI Photo Enhancer App in 2026
- Upload the original photo, checking that its orientation and full pixel dimensions are retained.
- Choose moderate noise reduction or enlargement, and request preservation of facial features, colors, and fabric patterns.
- Generate one enhanced version, then compare problem areas against the original at the same zoom level.
- Export at the dimensions your destination needs, then reopen the saved file to check color and detail.
Example prompt: Enhance this photo for natural clarity: reduce low-light noise, recover midtone detail, keep skin texture realistic, avoid halos on edges, and upscale 2x without changing the original colors.
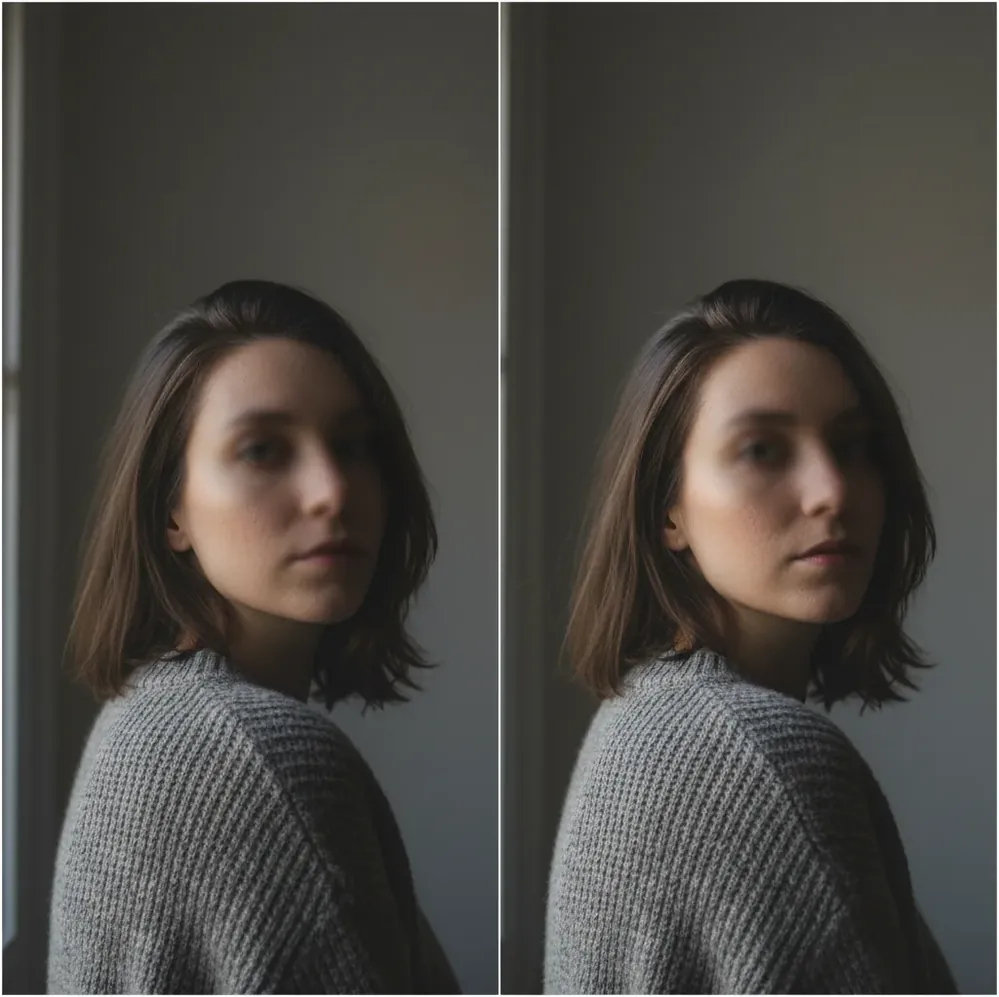
The best ai photo enhancer app in 2026 is one that can denoise, sharpen, upscale, and correct exposure without making skin look plastic or edges look haloed. For most creators, the right choice depends less on maximum sharpness and more on natural texture, export quality, mobile speed, and how well the app handles low-light phone photos.
What Is an AI Photo Enhancer App in 2026?
An AI photo enhancer app is software that uses machine learning to improve a photo’s perceived quality by reducing noise, correcting tone, restoring detail, and increasing resolution. In 2026, these apps usually combine denoising, deblurring, face restoration, super-resolution upscaling, and automatic color correction in one workflow.
Unlike a traditional sharpen slider, an AI enhancer predicts cleaner pixels from image patterns learned during model training. That means it can make a soft selfie, grainy indoor photo, old scanned print, or compressed product image look clearer. The result is still an interpretation, so the best outputs come from photos that are slightly soft or noisy, not completely blurred.
How Does AI Photo Enhancement Actually Work?
AI photo enhancement works by detecting degradation patterns such as sensor noise, motion blur, lens softness, low contrast, JPEG blocking, and missing edge detail. Computer vision models then estimate a cleaner version of the image using feature extraction, semantic recognition, and pixel reconstruction.
Many modern enhancers use convolutional neural networks, transformer-based image models, or diffusion restoration systems trained on degraded and high-quality image pairs. The model learns how hair strands, eyelashes, fabric weave, text edges, skin pores, and background texture should typically behave. Good apps balance reconstruction with restraint; bad outputs happen when the model invents too much detail or smooths away texture that should remain visible.
How Do You Enhance a Photo Without Making It Look Fake?
Start With the Best Original File
Use the highest-resolution camera file available, not a compressed copy from a messaging app or social platform. AI enhancement works better when it has real pixels, clean color data, and fewer JPEG artifacts to fight.
Run One Moderate Enhancement Pass
Apply a balanced enhancement first instead of immediately choosing maximum sharpness or maximum face restoration. A single moderate pass usually keeps skin texture, hair, glasses, jewelry, and clothing edges more natural.
Check the Image at 100% Zoom
Inspect eyes, teeth, hairlines, text, hands, and high-contrast edges. These areas reveal the first signs of over-processing, including waxy skin, crunchy eyelashes, edge halos, strange teeth, or clumped shadow noise.
Compare Against the Original
Open the before and after in the same viewer at the same size. This prevents display bias, where a brighter or more contrasty image feels better even if it has lost natural detail.
Export for the Final Use
Choose export settings based on the destination: smaller JPEGs for social posts, higher-quality files for portfolio pages, and larger upscaled versions for prints, gifts, product listings, or brand assets.
Which AI Photo Enhancer Tools Are Worth Comparing in 2026?
| Tool | Best fit | Strengths | Watch out for |
|---|---|---|---|
| Pict AI | Fast browser or iPhone enhancement | Simple upload workflow, denoise, clarity improvement, and upscaling for everyday photos | As with any cloud tool, avoid sensitive images and check terms for commercial use |
| Adobe Lightroom | Photographers who want manual control | Strong raw editing, masking, noise reduction, color grading, and export management | More setup and editing knowledge required than one-click enhancer apps |
| Adobe Photoshop | Detailed retouching and professional composites | Layer-based edits, neural filters, restoration tools, and precise repair workflows | Can be slower for quick phone-photo cleanup |
| Topaz Photo AI | High-resolution upscaling and detail recovery | Strong sharpening, denoising, face recovery, and print-oriented output | Desktop workflow and paid pricing may be more than casual users need |
| Remini | Face-focused restoration and selfies | Often effective on old portraits, low-resolution faces, and social-ready before-and-afters | Can create overly polished or synthetic-looking facial texture |
| Canva | Social graphics and quick design workflows | Useful when enhancement is part of a post, flyer, thumbnail, or brand template | Less specialized for technical restoration than dedicated photo enhancers |
| Let’s Enhance | Upscaling small images for web or commerce | Good for resolution increase, product images, and batch-style enlargement | Output quality depends heavily on source compression and fine detail |
The best tool depends on the job: use a one-click enhancer for quick clarity, a raw editor for controlled photography work, and a dedicated upscaler when the final image must be printed or listed at a larger size.
What Photos Benefit Most From AI Enhancement?
- Low-light restaurant, concert, and bar photos where faces are visible but shadows contain grain.
- Slightly soft selfies, profile photos, creator headshots, and dating app images that need cleaner eyes and skin without full retouching.
- Old phone photos that look dull because of small sensors, weak dynamic range, or older image processing.
- Scanned prints, family photos, and nostalgic images intended for gifts, albums, memorial posts, or framed prints.
- Small product images that need clearer edges, cleaner backgrounds, and higher resolution for listings or storefront thumbnails.
- Real estate and interior photos where noise, dim corners, and muddy texture make rooms feel less polished.
- Screenshots, documents, and text-heavy images where crisp edges improve readability.
What Prompt Recipes Help Guide AI Photo Enhancement?
- Natural portrait cleanup: Enhance clarity, reduce noise, keep natural skin texture, preserve pores, avoid plastic smoothing, and keep eyes realistic.
- Low-light phone photo: Denoise shadows, improve exposure, reduce color speckling, keep warm indoor lighting, and avoid over-sharpened edges.
- Old family photo restoration: Restore faded contrast, reduce scratches and grain, preserve original facial features, and avoid modernizing clothing or hair.
- Product listing image: Increase resolution, sharpen product edges, clean background noise, preserve true color, and avoid changing shape or material texture.
- Print-ready upscale: Upscale to a larger size, keep fine detail natural, reduce compression artifacts, and avoid halos around high-contrast edges.
- Social post version: Make the image cleaner and brighter for mobile viewing while keeping the result realistic at 100% zoom.
What Are the Real Limits of AI Photo Enhancement?
- Strong motion blur cannot be truly recovered; the model may create sharper-looking but inaccurate details.
- Blown highlights usually stay blown because there is no recoverable texture in pure white areas.
- Tiny faces in group photos may look smoothed or distorted because there are too few pixels for reliable reconstruction.
- Heavy JPEG compression can leave blocky patches, banding, or smeared gradients even after enhancement.
How Do You Choose the Best Enhancer for Your Photos?
Choose an AI photo enhancer based on your source images and final use, not just the sharpest demo result. If you mostly clean up social photos, prioritize speed, natural faces, mobile access, and simple before-and-after comparison. If you print, sell, or publish professionally, prioritize export size, color control, file formats, and licensing clarity.
A practical test is to run the same difficult photo through two or three apps: one low-light portrait, one detailed object, and one compressed image. Compare skin texture, edge halos, shadow noise, text accuracy, and file size. Pict AI is useful for quick everyday enhancement, while deeper editors make sense when you need manual masks, raw files, or layered retouching.
Fix Uneven Detail, Color Shifts, and Export Problems
An ai photo enhancer can improve one part of a picture while damaging another. When that happens, changing the workflow is often more useful than increasing enhancement strength. These failures call for targeted corrections rather than another full-image pass.
- One face looks crisp while others look untouched. Face restoration may treat subjects differently when their sizes or angles vary. Disable face-specific processing and compare a general enhancement instead. If the editor supports masks, apply a weaker correction to the affected face, keeping the original visible underneath.
- Fabric develops ripples or repeating patterns. Fine stripes, mesh, and woven textiles can produce moiré or invented texture. Reduce detail recovery and avoid further enlargement. For clothing catalogs, preserve the original fabric region with a mask rather than accepting a sharper but different pattern.
- The saved image looks darker or less saturated. Check whether an HDR source became an SDR export, or whether the viewer handles its color profile differently. For ordinary web sharing, an SDR copy in sRGB is usually easier to display consistently. Judge that exported copy, not just the editing preview.
- The photo rotates incorrectly or loses its transparency. Orientation metadata and unsupported output formats can cause these changes. Save a correctly rotated copy before uploading. For cutout products or logos, choose an export format that retains an alpha channel; JPEG cannot preserve transparency.
- A batch gives similar photos noticeably different finishes. Automatic exposure and restoration can vary across frames. Process a representative image first, then use fixed settings where available. Review the whole set together for matching brightness and color before exporting.
Keep corrections separate when possible: exposure, noise reduction, enlargement, then any final sharpening. This makes it easier to identify which operation introduced a defect and replace that step without rebuilding the entire edit.
Export Specifications That Change the Final Result
Look beyond the resolution advertised on an app’s landing page. The useful specification is what it actually exports for your file and chosen mode. A pict.ai vs remini comparison should include saved dimensions, compression, transparency, and control over restoration, not just the appearance of portrait previews.
| Setting or specification | What to check | Why it matters |
|---|---|---|
| Pixel dimensions | Record input and output width × height. | A 1500 × 1000 image enlarged 2× becomes 3000 × 2000: four times the pixels, not four times the captured detail. |
| Print resolution | Divide pixel dimensions by the intended pixels per inch. | At 300 ppi, 3000 × 2400 pixels supports a 10 × 8-inch print. Changing the ppi label alone adds no pixels. |
| File format | Check JPEG quality, PNG transparency, and TIFF support if needed. | PNG avoids another lossy compression step, but cannot undo compression already present in the source. |
| Color profile and HDR | Check embedded profiles and whether HDR is retained. | An unsupported display or conversion can change the appearance of highlights and colors. |
| Upload and export limits | Check file-size caps, dimension caps, and paid export restrictions. | An accepted upload does not guarantee a full-resolution download. |
| Processing time | Check queue time separately from generation time. | Large files and batch jobs may take longer; a preview arriving quickly does not mean the export is ready. |
For an ai video enhancer, duration and frame rate are additional constraints: a still-photo export tells you nothing about clip-length limits or whether detail remains consistent between frames. Compare those specifications separately if you need both photo and video processing.
Four Misconceptions That Can Lead to the Wrong Enhancer
- Myth: A larger file means a better enhancement.
- File size also depends on format, compression, and metadata. A large PNG may contain the same visible detail as a smaller, high-quality JPEG. Compare image content and pixel dimensions rather than megabytes alone.
- Myth: Enlarging 4× is always better than enlarging 2×.
- Extra enlargement increases processing demands and can make repeated or fabricated textures easier to see. Choose the smallest enlargement that satisfies the destination’s pixel requirements, especially for images viewed mainly on phones.
- Myth: A single quality score identifies the best app.
- A score cannot show whether an enhancer preserved a birthmark, a product’s stitching, or lettering on packaging. A tool suited to portraits may behave differently on architecture or merchandise. Choose with representative images from your actual workload.
- Myth: An enhanced image can replace the original archive.
- Enhancement changes pixels, and exports may remove metadata. Keep camera files or untouched scans separately. Store enhanced copies with descriptive filenames so future edits can start from the source rather than an already processed version.
When asking “is ai photo enhancer accurate,” distinguish visual improvement from faithful preservation. A cleaner image can still contain altered features. For identification, records, or product documentation, retaining the original matters more than achieving the sharpest-looking result.
AI Photo Enhancement: Quality, Blur, and Privacy Questions
Use RAW when the editor supports your camera’s format and you need substantial exposure or white-balance adjustments. RAW provides more flexibility before enhancement, but many simple enhancers accept only rendered images. In that case, develop the RAW file first and export a high-quality supported format. Converting a JPEG to RAW does not restore lost image data.
Yes, if the editor offers masks, selections, or layers. You can apply noise reduction to a background while leaving a face unchanged, or sharpen a subject without emphasizing background grain. One-click apps may not offer regional controls. A separate layer-based editor can blend an enhanced copy with the original, though careful masking is needed around hair and fine edges.
The best ai photo enhancer app in 2026 is one that improves clarity, reduces noise, upscales resolution, and keeps faces natural. The right choice depends on whether you need quick social edits, professional retouching, or print-ready enlargement.
Yes, they can improve perceived quality by reducing noise, sharpening edges, correcting tone, and reconstructing detail. They work best on photos that are slightly soft, grainy, compressed, or low resolution.
It can improve mild blur or softness, but it cannot perfectly recover strong motion blur. In severe cases, the app is estimating detail rather than restoring the exact original scene.
No. Sharpening mainly increases local edge contrast, while AI enhancement can combine denoising, deblurring, exposure correction, face restoration, and super-resolution upscaling.
Faces look fake when smoothing, denoising, or face reconstruction is too strong. Check skin pores, eyelashes, teeth, and hairlines at 100% zoom before exporting.
Upload the original camera file or highest-quality export available. Avoid screenshots, social media downloads, and messaging-app copies because they often contain heavy compression artifacts.
Many AI enhancers can upscale images for small prints, posters, gifts, and portfolio use. For best results, inspect the file at print size and watch for halos, invented texture, or distorted text.
Safety depends on the app’s upload, storage, and deletion policies. Avoid uploading sensitive, legal, medical, or confidential images unless you trust the service and understand its terms.
Compare the enhanced image with the original at the same size, then inspect faces, edges, shadows, and text at 100% zoom. If the image looks cleaner without looking synthetic, it is usually ready to share.