How to Edit Car Photos for Listings
To edit car photos for listings, make the vehicle clearer without changing its real condition. Start with straight crops, balanced exposure, accurate paint color, light background cleanup, and consistent export sizes so buyers can inspect the car quickly on mobile.
How to Edit Car Photos for Listings
- Upload an original car photo with the full vehicle visible and enough surrounding space for cropping.
- Describe lighting corrections and background cleanup, specifying that paint color, damage, badges, and equipment must remain unchanged.
- Generate the edited image, keeping the original available to compare wheels, reflections, body edges, and dashboard details.
- Review the marketplace preview, reject invented details, and export matching crops without obscuring the car’s condition.
Example prompt: Edit this car photo for an online listing: straighten the frame, correct white balance, reduce windshield glare, lift shadows without over-HDR, clean small background clutter, keep paint color accurate, export sharp and natural.
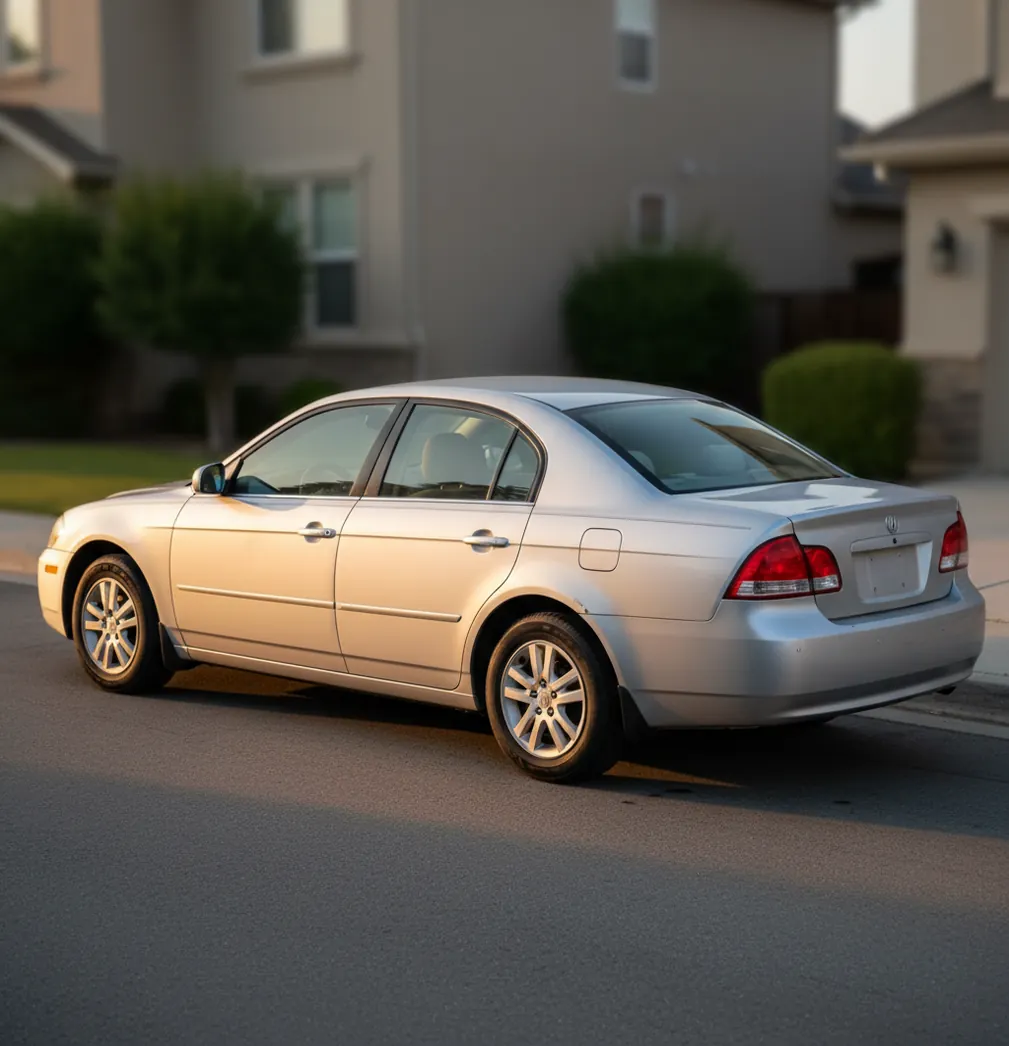
The best way to edit car photos for listings is to correct exposure, white balance, crop, and small distractions while preserving the vehicle’s true condition. Keep paint color realistic, leave visible damage intact, and export a consistent photo set that shows exterior angles, interior details, wheels, odometer, trunk, and engine bay.
What Does Editing Car Photos for Listings Actually Mean?
Editing car photos for listings means improving clarity, consistency, and readability so buyers can judge the vehicle accurately. It usually includes exposure correction, white balance, straightening, cropping, glare reduction, mild sharpening, and removing background clutter such as bins, cones, or driveway debris.
Good vehicle photo editing is not cosmetic deception. You should not remove dents, scratches, warning lights, cracked trim, tire wear, rust, odometer readings, or upholstery damage. The goal is to make the car easier to evaluate on Marketplace, dealer portals, classifieds, and auction sites, not to make it look newer than it is.
How Do Car Photo Edits Help Buyers Trust a Listing?
Car photo edits help buyers trust a listing when they make details easier to inspect. A bright, level, color-accurate image lets someone see body lines, wheel condition, interior wear, dashboard controls, tire tread, VIN plates, and odometer numbers without guessing through shadows or glare.
Consistency matters because buyers swipe through 15 to 30 images quickly. If one angle is warm and sunny, another is blue and dark, and the interior is underexposed, the listing feels less reliable. Matching brightness and framing across the full set creates a dealership-style presentation while still feeling honest and seller-made.
How Should You Edit Car Photos on a Phone?
Choose the strongest photos first
Select 15 to 30 images that show front three-quarter, rear three-quarter, both sides, wheels, tires, seats, dashboard, odometer, trunk, engine bay, keys, service records, and any visible damage. Editing weak angles wastes time.
Straighten the horizon and body lines
Use the car’s rocker panel, grille, garage door, curb, or building edge as a reference. A level crop makes the vehicle feel stable and prevents the common driveway problem where the car looks tilted or poorly photographed.
Correct exposure before color
Lift shadows under the wheel wells and interior, then reduce highlights on the hood, windshield, and chrome. Avoid extreme HDR because glossy paint can become crunchy, patchy, or unnaturally reflective.
Set believable white balance
Adjust temperature and tint until the paint, pavement, and interior materials look natural. White, silver, black, and red cars reveal bad color correction quickly, especially when photos were shot in mixed sun and shade.
Clean the background lightly
Remove distracting items around the vehicle, such as trash bins, hoses, signs, cones, and random driveway clutter. Do not remove dents, scratches, curb rash, cracked lights, warning symbols, or worn upholstery.
Export a consistent listing set
Use the same aspect ratio across the listing, usually 4:3, 3:4, or 1:1 depending on the marketplace. Keep resolution high enough for zooming, ideally at least 1600 pixels on the long edge.
Which Apps Are Best for Editing Car Listing Photos?
| Tool | Best For | Strengths | Watch Out For |
|---|---|---|---|
| Pict AI | Fast mobile listing cleanup | Good for quick lighting fixes, background cleanup, straight crops, and consistent exports on iOS or Android. | AI cleanup still needs review around mirrors, wheel spokes, badges, and glossy reflections. |
| Canva | Listing graphics and collage layouts | Useful for cover images, text labels, social posts, price-drop graphics, and branded dealer templates. | Not ideal for detailed retouching, and some templates or assets may have licensing limits. |
| Adobe Photoshop Express | Manual tone and repair control | Strong for exposure, healing, sharpening, noise reduction, and precise color adjustments. | Takes more manual effort if you need to edit a full 20-photo vehicle set quickly. |
| Snapseed | Free manual mobile edits | Useful selective adjustments, perspective correction, healing, and detail tools. | Results depend heavily on the editor’s skill and can become overprocessed. |
Choose the editor based on workflow: use a fast cleanup app for full listing sets, a design app for cover graphics, and a manual editor when one important image needs precise correction.
What Photo Order Works Best for a Vehicle Listing?
The best photo order starts with a clean exterior hero image, then moves from broad proof to specific detail. Buyers usually want to understand shape, condition, mileage, interior wear, and maintenance confidence before messaging or scheduling a test drive.
A practical order is: front three-quarter, rear three-quarter, driver side, passenger side, front, rear, each wheel, tire tread, front seats, rear seats, dashboard, odometer, infotainment, trunk, engine bay, VIN plate, keys, documents, and known flaws. Showing defects near the end is better than hiding them; it reduces wasted messages and improves buyer trust.
What Edits Make the Biggest Difference in Online Car Photos?
- Straightening: level horizons and body lines make the vehicle feel professionally photographed.
- Shadow recovery: lifting dark interiors helps buyers read seats, pedals, carpets, dashboards, and cargo areas.
- Highlight control: lowering hood, windshield, chrome, and headlight glare prevents blown-out white patches.
- White balance: accurate color keeps paint from looking too yellow, blue, green, or faded.
- Background cleanup: removing small distractions helps the car stand out without changing the car itself.
- Gentle sharpening: light detail enhancement helps tire tread, wheel texture, odometer numbers, and stitching remain readable.
- Consistent cropping: matching vehicle size across angles makes the full listing feel organized and intentional.
What Prompt Recipes Can You Use for AI Car Photo Edits?
- Clean background prompt: “Remove small driveway clutter and distracting objects around the vehicle. Keep the car, wheels, shadows, reflections, license plate area, dents, scratches, and all visible condition details unchanged.”
- Lighting correction prompt: “Balance exposure for a used car listing photo. Reduce windshield and hood glare, lift dark interior shadows, keep paint color realistic, and avoid an HDR or showroom effect.”
- Cover photo prompt: “Create a clean marketplace cover image from this car photo. Straighten the crop, center the vehicle, keep natural pavement shadows, and do not modify the vehicle condition.”
- Interior detail prompt: “Brighten the cabin so seats, dashboard, odometer, pedals, and center console are readable. Preserve wear, stains, warning lights, and material texture.”
- Wheel close-up prompt: “Improve clarity on the wheel and tire area. Keep curb rash, tread wear, brake dust, sidewall markings, and factory wheel shape accurate.”
When Can Editing Car Photos Backfire?
- Heavy contrast can make glossy black, red, or metallic paint look patchy or artificially polished.
- Aggressive HDR can create halos around rooflines, mirrors, antennas, and window edges.
- AI background removal can fail around wheel spokes, glass reflections, roof racks, tow hooks, and thin trim.
- Brightening night photos can reveal noise, color banding, LED flicker, and muddy interior shadows.
What Export Settings Should You Use for Car Listings?
Use export settings that keep images sharp on mobile while avoiding huge uploads that slow down listing platforms. A long edge of 1600 to 2500 pixels is usually enough for buyer zoom, and JPEG quality around 80 to 90 percent balances clarity with file size.
Keep one aspect ratio for the main set when possible. Square crops work well for social marketplaces, while 4:3 or 3:4 often feels more natural for full vehicle angles. Avoid tiny screenshots, messaging-app compression, and mixed portrait-landscape sets unless the platform displays them cleanly.
More photo guides for selling online
Check the Uploaded Listing Against Your Original Photos
Review the actual marketplace preview before publishing, not just the exported files. Automatic cropping and compression can hide details that looked clear in your editor. Keep the originals open alongside the edited set and check these specific failure points.
- Verify vehicle identity. Compare badges, grille openings, wheel designs, roof rails, and exhaust outlets with the originals. A ChatGPT edit photo request should explicitly preserve these features, but instructions are not a guarantee. Reject any result that invents a trim badge or changes equipment.
- Check permission separately from editing quality. The question “is it legal to edit someone elses photo with ai” matters if you use a dealer image, photographer’s shot, or previous owner’s photo. Confirm permission to edit and republish; possessing a copy does not establish those rights.
- Inspect the vehicle’s contact with the ground. An ai image generator for amazon listings may encourage isolated product imagery, but a car listing needs believable scale and placement. Look for floating tires, missing contact shadows, or pavement textures that merge into the tread.
- Compare surroundings across angles. An ai photo editor for real estate listings may prioritize tidier property backgrounds. For a vehicle set, check that cleanup has not created different fences, parking lines, or reflections in consecutive photographs.
- Remove sales-template leftovers. An ai photo editor for shopify sellers may offer promotional layouts. Check for added labels, decorative borders, or stock props that obstruct the car or imply accessories are included.
- Inspect text after upload. When using an app to help edit product photos, keep generative changes away from dashboard displays and service documents. In the marketplace preview, confirm mileage remains legible, private document details are concealed, and the cover crop includes both bumpers.
Common Questions About Editing Vehicle Listing Photos
Blurring a license plate is a reasonable privacy choice for a public listing, though it is not a universal requirement. Use a simple blur or solid mask rather than generating replacement characters. Check every exterior angle for missed plates and reflections. Keep an unedited original, and provide identifying information privately when a legitimate buyer needs it for vehicle checks.
Yes. Generative editing can accidentally alter badges, wheel spokes, headlights, roof rails, or dashboard controls, especially when replacing backgrounds near the vehicle’s edges. These changes can misrepresent the car’s equipment even if the overall image looks convincing. Compare edited images with originals at full size, and discard altered results rather than relying on a written description to correct misleading pictures.
Straighten the image, correct exposure, set accurate white balance, reduce glare, clean small background distractions, and export a consistent set. Do not edit out real damage or wear.
Yes, basic edits help buyers see the car clearly and can make the listing feel more trustworthy. Keep edits honest and focused on readability rather than cosmetic changes.
Most strong car listings use 15 to 30 photos. Include exterior angles, wheels, interior, odometer, trunk, engine bay, documents, and close-ups of any flaws.
You can clean or simplify the background, but a fully removed background may look artificial if shadows and edges are wrong. Natural driveways, parking lots, or open shade often feel more trustworthy.
Lower highlights, reduce exposure slightly, and avoid pushing contrast too far. When shooting, move the car into open shade or photograph from a slight angle to reduce windshield and hood reflections.
Square works well for many social marketplaces, while 4:3 or 3:4 is often better for showing the full vehicle. The most important rule is to keep the main photo set consistent.
No, you should not remove scratches, dents, rust, warning lights, or upholstery damage from sale photos. Hiding condition issues can violate platform rules and create problems with buyers.
Wash the car, shoot in open shade, stand far enough back to avoid wide-angle distortion, and capture all major angles and details. Cleaner original photos need fewer edits and look more believable.
Upload images with at least 1600 pixels on the long edge when possible. This gives buyers enough detail to zoom into wheels, interior wear, odometer numbers, and body panels.