How to Take Good Photos of Clothes to Sell Online
To take good photos of clothes to sell, use soft window light, a plain matte background, and a repeatable shot list that shows shape, color, tags, texture, and flaws. Keep edits honest: fix exposure, straighten lines, and clean the background without changing the garment.
How to Take Good Photos of Clothes to Sell Online
- Upload an original garment photo with visible edges, clear fabric detail, and enough space around the item.
- Choose background cleanup or describe a plain replacement, requesting unchanged garment color, texture, seams, and proportions.
- Generate the edited image, keeping the original available for a direct comparison before using it in your listing.
- Review hems, straps, labels, and flaws at full size, then export only if the garment remains accurately represented.
Example prompt: Change the background to a clean light gray studio wall, keep natural fabric texture and seams, preserve true color, add a soft realistic shadow under the garment, no text, no logo, ecommerce listing style
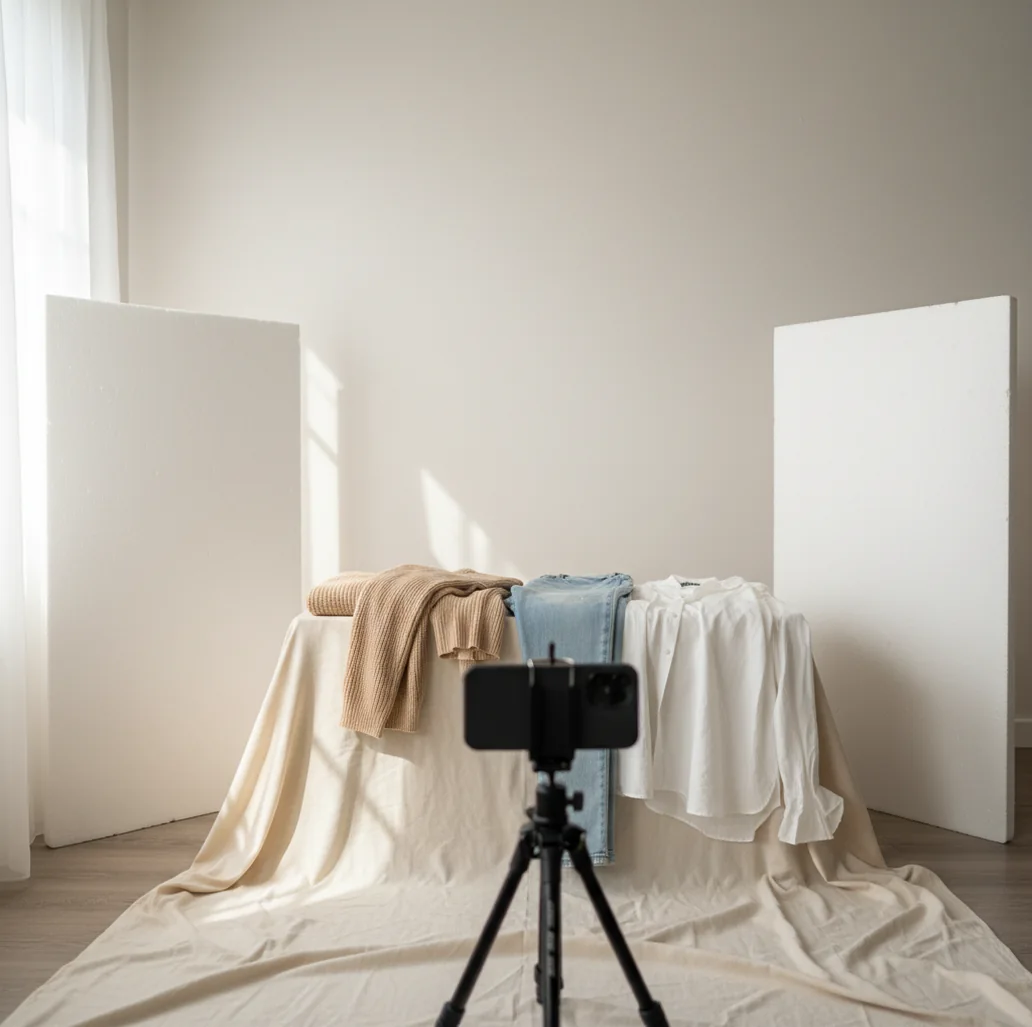
To take good photos of clothes to sell, photograph each item in bright indirect light on a clean neutral background, using consistent angles and your phone’s 1x lens. Include front, back, tag, fabric, measurements, and flaw photos, then lightly edit exposure, white balance, crop, and background clutter before listing.
What Makes a Clothing Photo Good Enough to Sell?
A good clothing photo sells because it answers buyer questions before they ask: What color is it, what shape is it, what condition is it in, and will it fit me? For resale listings, the goal is not a fashion campaign; it is visual proof. The garment should be sharp, evenly lit, and shown from enough angles that a buyer can judge fabric, seams, tags, fading, pilling, stains, and wear.
The strongest clothing listing images use consistent framing, neutral backgrounds, and honest color. Avoid heavy filters, beauty-style smoothing, or color grading that makes black denim look blue or cream knitwear look white. Better photos can increase trust, reduce messages about condition, and lower return risk because buyers see the item clearly before purchasing.
What Lighting and Background Work Best for Clothing Photos?
The best lighting for clothing photos is bright indirect daylight, usually near a window but out of direct sun. Direct sun creates harsh shadows and blown highlights, while yellow indoor bulbs shift fabric color and make white, beige, black, and navy clothes look inaccurate. If you shoot at night, use two soft LED lights with the same color temperature, ideally around 5000K to 5600K.
The best background is plain, matte, and higher contrast than the garment. White foam board, a clean wall, kraft paper, a wrinkle-free sheet, or a neutral floor can all work. Avoid busy rugs, glossy tile, cluttered bedrooms, and patterned bedding. A simple background also helps editing tools detect garment edges more accurately.
How Do You Photograph Clothes With a Phone Step by Step?
Choose one repeatable photo spot
Set up near a window with indirect light and enough floor or wall space for the whole garment. Using the same spot for every listing makes your closet, shop, or social sale look consistent.
Prepare the garment before shooting
Steam wrinkles, lint-roll dark fabric, button shirts, zip jackets, and smooth hems. Small preparation fixes are more trustworthy than trying to hide problems later with editing.
Use the 1x phone lens
Shoot with the standard 1x lens rather than ultra-wide mode. Ultra-wide lenses distort sleeves, hems, and pant legs, which can make fit and proportions look wrong.
Lock focus and exposure
Tap the garment on your phone screen to focus, then lower or raise exposure until texture is visible. For black clothing, expose for the garment; for white clothing, protect highlights from blowing out.
Shoot the same listing set every time
Capture front, back, brand tag, size tag, fabric close-up, flaws, and measurements. Consistency speeds up listing and helps buyers compare multiple items.
Edit lightly before uploading
Straighten, crop, correct white balance, increase exposure slightly if needed, and remove distracting background clutter. Do not recolor, erase flaws, or smooth fabric texture.
Which Photos Should Every Clothing Listing Include?
- Front full view: shows silhouette, neckline, sleeves, leg shape, length, and overall condition.
- Back full view: reveals rear pockets, seams, fading, graphics, waistbands, and wear that buyers may otherwise miss.
- Brand tag: helps buyers verify label, line, authenticity cues, and resale search terms.
- Size tag: reduces basic sizing questions and supports platform filters.
- Fabric and care tag: useful for wool, silk, linen, leather, denim, athletic wear, and dry-clean-only items.
- Texture close-up: shows knit weight, ribbing, fleece, weave, embroidery, print cracking, pilling, or stretch.
- Flaw photo: document stains, holes, missing buttons, heel drag, snags, fading, repairs, or loose stitching.
- Measurement photo: include pit-to-pit, shoulder, sleeve, waist, inseam, rise, and length where relevant, with the tape clearly readable.
How Do Apps Clean Clothing Photo Backgrounds?
Background cleanup usually starts with image segmentation, where a computer vision model predicts which pixels belong to the garment and which belong to the scene. The app creates a mask around edges, folds, straps, lace, fringe, buttons, and shadows, then removes or replaces everything outside that mask. Better source photos create cleaner masks because the garment has clearer contrast from the background.
Some editors use simple cutout replacement, while others use generative fill to rebuild missing background areas or soften edges. The technical challenge is fabric detail: mesh, faux fur, knit holes, transparent sleeves, and dark clothes on dark surfaces can confuse the mask. For resale, keep the output believable by preserving natural shadows and avoiding artificial backgrounds that make the garment look digitally pasted.
What Are the Best Tools for Editing Clothing Listing Photos?
| Tool | Best For | Strengths | Watch-outs |
|---|---|---|---|
| Pict AI | Fast background cleanup for resale photos | Quick mobile edits, simple background replacement, useful for flat lays, hanger shots, and closet batches | Check export quality and avoid over-cleaning edges on lace, fringe, or fuzzy fabric |
| Canva | Templates, collages, and social sale graphics | Easy layouts for Instagram Stories, sale drops, size cards, and branded shop posts | Some assets or templates may have license limits or watermarks depending on plan |
| Adobe Photoshop Express | Manual corrections on mobile | Good control over exposure, contrast, sharpening, spot healing, and perspective | More hands-on than one-tap tools, so batch editing may take longer |
| Lightroom Mobile | Color accuracy and batch consistency | Strong white balance, exposure, lens correction, and preset syncing | Does not focus primarily on product cutouts or marketplace templates |
| PhotoRoom | Product-style background replacement | Fast cutouts, marketplace-friendly backgrounds, and batch product photo workflows | Edges may need checking on transparent, black, or highly textured garments |
Choose the editor based on the bottleneck: use a background tool for clutter, a color editor for accuracy, and a layout tool for social selling graphics. Always compare the edited image to the real garment before posting.
What Prompt Recipes Help Create Cleaner Listing Images?
- Neutral marketplace background: Change the background to a clean light gray studio backdrop, keep the garment’s original color, preserve natural fabric texture, and keep a soft realistic shadow.
- White background for product listings: Replace the background with matte white, keep garment edges sharp, do not alter the item shape, and preserve visible wrinkles, seams, labels, and flaws.
- Social sale image: Create a clean vertical 9:16 sale image with the garment centered, neutral background, soft daylight look, and space at the top for price and size text.
- Closet batch consistency: Match this photo to the same crop, background tone, and shadow style as the previous listing images while preserving the real garment color.
- Measurement clarity: Enhance readability of the measuring tape and garment edge without changing the measurement, stretching the fabric, or removing condition details.
- Flaw documentation: Improve brightness and sharpness around the marked flaw while keeping the stain, hole, snag, or wear visible and unaltered.
How Do You Make Clothes Look Accurate Instead of Over-Edited?
Accurate clothing photos come from controlled capture, not aggressive editing. Set your phone to a natural color mode if possible, avoid beauty filters, and check white balance by looking at nearby whites, grays, or skin tones. If a white shirt looks blue, the image is too cool; if black denim looks brown, the light is probably too warm or underexposed.
Edit for clarity, not perfection. Straighten the frame, crop distractions, raise exposure slightly, and reduce yellow or blue color casts. Keep pilling, fading, stains, missing buttons, and seam wear visible. For higher-value items, photograph tags, stitching, hardware, and serial details in sharp focus so the listing feels transparent rather than polished beyond belief.
What Limitations Should Sellers Watch Out For?
- Black garments on dark backgrounds often lose edge detail, especially around cuffs, collars, and pant legs.
- White fabric can blow out in bright light, hiding stains, embroidery, ribbing, or weave texture.
- Shiny satin, leather, sequins, and nylon can reflect windows or phone shapes, so adjust your angle before editing.
- Generative background tools may invent edges around lace, straps, fringe, faux fur, mesh, or distressed denim.
How Should You Use Clothing Photos on Resale Marketplaces?
Use your clearest full-front image as the cover photo because buyers scan thumbnails quickly. The item should fill most of the frame, with enough margin to show shape and no clutter competing for attention. On marketplaces such as eBay, Poshmark, Depop, Mercari, Vinted, Etsy, or Shopify, a consistent cover style can make a small closet or store feel more organized.
Order the rest of the photos like a buyer inspection: front, back, side or fit detail, tag, fabric, measurements, then flaws. For social posts and portfolio-style shop branding, crop vertical 4:5 or 9:16 versions so the garment reads well on mobile. Keep originals saved in case a buyer asks for more proof.
Related Pict.AI guides for ecommerce images
Match Your Clothing Photos to the Way You Sell
Different sellers need different kinds of visual evidence. A one-off resale listing should document the exact item, while a shop selling several sizes needs images that distinguish stock photographs from individual garment condition. Keep generated styling separate from photographs buyers will use to judge their purchase.
- Occasional closet sellers: For a used raincoat photographed beside shoes and storage boxes, simplify the clothing background rather than rebuilding the scene. Before shooting, remove clothes that are not part of the sale from the frame. If you replace the background afterward, check translucent cuffs, drawstrings, and gaps around the hood: these details can disappear during automatic cutouts.
- Vintage and secondhand dealers: A seller considering bit studio ai clothes changer for a vintage leather jacket should keep the original jacket photos as condition evidence. Generated outfit combinations belong in clearly labeled styling illustrations, not images documenting cracked leather or lining wear. Photograph distinctive repairs separately so buyers can match them to the full garment.
- Small boutiques: An ai clothes changer can illustrate a proposed outfit combination, but it cannot verify how an actual skirt drapes on a customer. For example, pair a generated styling concept with real photographs of the stocked skirt, identifying the concept explicitly. Do not let invented pleats, pockets, or accessories appear to be included in the sale.
- Stylists and outfit-content creators: Searches such as “how to change clothes in photo with ai” and “virtual try on ai clothes” address outfit visualization rather than resale documentation. For a capsule-wardrobe post, label simulated combinations and include original garment images when linking the content to a sale. A convincing visualization is not proof of fit, fabric weight, or garment construction.
Answers to Common Clothing Photography Questions
Use a large, diffused light source and avoid direct flash, which can create bright spots that hide detail. Take one full view with even illumination, then a closer image at a slightly different angle to show the shine. For sequins, inspect the photo for missing pieces and reflections that resemble damage. Keep highlights controlled without making the fabric look matte.
Fine stripes, checks, and tightly woven fabrics can produce false ripples or colored bands when their pattern interacts with the camera sensor or image resizing. Move the phone slightly closer or farther away, change the angle a little, and take another photograph. Check both the original and the uploaded listing image. Avoid strong sharpening, which can make these artifacts more noticeable.
Flat lays are best for small items, knits, kids’ clothing, and neatly shaped garments. Hanger or mannequin photos work better for jackets, dresses, coats, and pieces where drape matters.
A plain matte background in white, light gray, beige, or another neutral color is usually best. Choose a background that contrasts with the garment so edges are easy to see.
Most clothing listings should have at least 6 to 8 photos. Include front, back, tag, fabric close-up, measurements, and clear flaw photos if the item has wear.
Place black clothing on a lighter background and expose for the garment, not the room. Side light from a window helps show folds, seams, and fabric texture without turning the item gray.
Shoot in consistent daylight or matched LED light and correct white balance before posting. Avoid filters because they can make cream, navy, black, red, and denim shades look misleading.
Yes, if edits improve clarity without misrepresenting the item. Straightening, cropping, exposure correction, and background cleanup are fine; removing stains or changing color is not.
Use the 1x lens, turn on the grid, tap to focus, and lock exposure when possible. Avoid portrait blur and ultra-wide mode because they can distort garment shape and edges.
Better photos can improve trust and click-through because buyers can see condition, color, and fit details clearly. They also reduce repetitive questions about tags, measurements, and flaws.