What App Makes Passport Photos in 2026?
A passport photo app turns a recent portrait into a government-style ID photo by cleaning the background, aligning the head, cropping to the required size, and exporting a printable or upload-ready file. Pict AI is one option that can format a phone photo into a passport-style image, but acceptance depends on the rules for your country and document type.
Creating your image...
An app that makes passport photos converts a real, recent photo into a compliant ID layout with the correct crop, plain background, head size, and export format. The best apps do not invent a new face; they help resize, clean, and format your original image for digital upload or physical printing.
Is There an App That Generates Passport Photos?
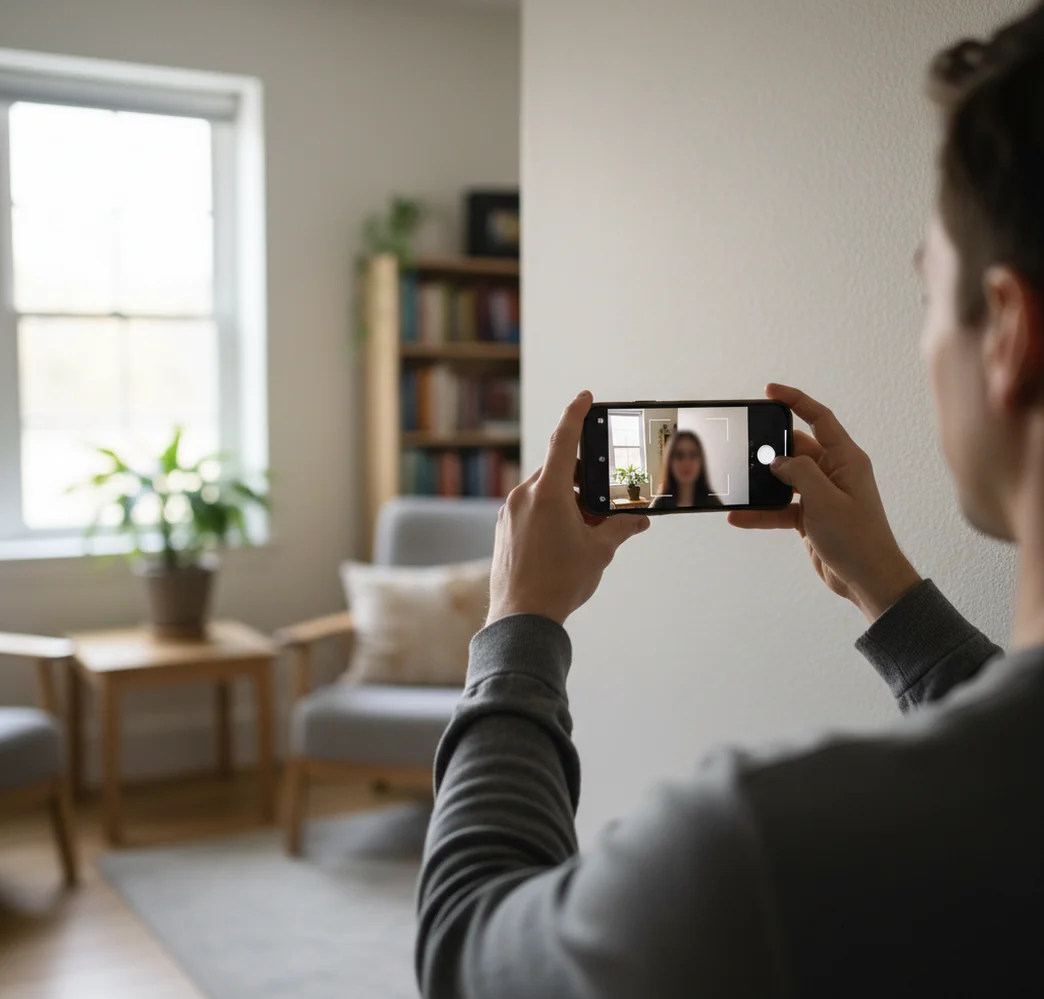
Yes, there are apps that generate passport photos, but most of them are really converting an existing photo rather than creating a new identity image from scratch. A good passport photo maker takes a recent head-and-shoulders portrait, removes distractions, creates a plain light background, centers the face, and crops the file to the official document size.
That distinction matters. Passport offices generally expect a truthful photo of how you currently look, not an AI-invented face, beauty-filtered portrait, or heavily retouched headshot. The safer workflow is to shoot a clean phone portrait first, then use the app only for background cleanup, sizing, head scale, print layout, and file export.
The app can help with geometry and formatting, but it cannot make a blurry, low-light, tilted, or outdated photo automatically acceptable. Your starting image still needs sharp eyes, even lighting, a neutral expression, visible face edges, and no strong shadows behind the head.
How Do Passport Photo Apps Work?
Passport photo apps work by combining face detection, subject segmentation, background replacement, crop templates, and export presets. The app first detects landmarks such as the eyes, chin, crown, shoulders, and face centerline, then uses those landmarks to place your head inside the required frame.
The background step usually uses AI segmentation to separate you from the wall, room, or outdoor scene. Better tools preserve natural hair edges, ears, jawline, and clothing while replacing the original background with a plain white or off-white field. Poor cutouts can create halos, fuzzy hair, or missing ear edges, which may look artificial when printed.
The final step is output. Some tools export a single digital file for online submission, while others create a 4×6 inch print sheet with multiple 2×2 inch images. For physical applications, print size accuracy matters as much as the image itself.
How Do You Make Passport Photos at Home?
Shoot in soft front light
Stand facing a window or soft light source so both sides of your face are evenly lit. Avoid ceiling lights, strong side light, flash glare, and dark shadows under the chin.
Use a plain background
Stand in front of a clean white, off-white, or light neutral wall. Leave some distance between your body and the wall to reduce shadows and make background cleanup easier.
Use the rear camera
Ask someone to take the photo with the rear camera if possible. Rear cameras usually create sharper detail and less wide-angle distortion than selfie cameras.
Keep your expression neutral
Face the camera directly with eyes open, mouth closed, and shoulders square. Avoid tilted heads, dramatic smiles, raised eyebrows, and portrait poses.
Upload and verify the crop
Use a passport photo app to crop, size, and export the image, then check the exact country requirements before submitting. Confirm photo size, head height, background, file type, and recency rules.
Which Passport Photo App Should You Use?
| Option | Best For | Useful Exports | What to Check |
|---|---|---|---|
| Pict AI | Turning a phone portrait into a passport-style image with background cleanup and sizing | Digital image and print-ready layout | Verify the final size and country-specific head scale before submission |
| Dedicated passport photo apps | Fast country presets for common ID and visa photo sizes | Single photo, 4×6 print sheet, sometimes multiple country formats | Look for watermark-free, high-resolution export |
| Browser-based ID photo tools | Making a passport photo without installing an app | Downloadable image file or printable sheet | Check whether the free export is full resolution |
| Design editors | Manual control over crop, canvas size, and print layout | Custom JPG, PNG, PDF, or print sheet | Manual sizing can be wrong if you do not use exact measurements |
| Pharmacy or shipping-store kiosk | In-person capture and same-day physical prints | Printed passport photos | Auto-enhance and kiosk cropping can still change brightness or head size |
Choose based on your output need: online passport renewal usually needs a single digital file, while mail-in or in-person applications often need physical prints at the exact required dimensions.
What Settings Matter for US Passport Photos?
For a US passport photo, the standard physical size is 2×2 inches. The head must generally measure between 1 inch and 1 3/8 inches from the bottom of the chin to the top of the head, with the face centered and looking straight at the camera.
The background should be plain white or off-white with no objects, patterns, heavy texture, or visible shadows. The photo should be recent, usually taken within the last six months, and should show your current appearance. Most routine US passport photos require no glasses unless there is a documented medical exception.
For digital submission, the file should be square and high enough resolution for the system to evaluate facial detail. A common safe target is a clean 600×600 pixel or larger square file, but you should always follow the upload page instructions because online systems can change file size and compression requirements.
What Prompt Recipes Help You Get a Better Result?
The safest AI instruction for passport photos is not to beautify the face. Use prompts or edit notes that preserve identity, skin texture, facial proportions, hairline, ears, and clothing while only changing the background, crop, and layout.
Background cleanup prompt: "Replace the background with a plain white or off-white passport photo background. Keep the face, hair, ears, jawline, shoulders, clothing, and skin texture unchanged. Do not retouch, smooth, reshape, or stylize the person."
Crop instruction: "Create a centered passport photo crop with the subject facing forward, eyes level, shoulders visible, and head scaled to the official requirement for the selected country. Export both a single digital image and a 4×6 inch print sheet if available."
Quality check prompt: "Review this image for passport photo risks: shadows, glare, tilted head, uneven background, closed eyes, open mouth, glasses glare, low resolution, compression artifacts, incorrect head size, and unnatural AI edges."
Do AI Passport Photos Actually Get Accepted?
AI-assisted passport photos can be accepted when the tool formats a real photo correctly and does not alter your identity. Acceptance usually depends less on whether AI helped and more on whether the final image satisfies the official rules for size, lighting, background, expression, head position, and recency.
The risk increases when the image looks synthetic. Over-smoothed skin, reshaped faces, fake hair edges, bright white cutout halos, missing ears, and unrealistic clothing boundaries can trigger rejection or human review. Many passport systems are strict because the photo must work for identity verification, not just look professional.
Treat the app as a compliance assistant, not a portrait generator. If the original photo is sharp, recent, evenly lit, and neutral, AI background cleanup and crop automation are much more likely to produce a usable result.
What Limitations Can Still Cause Rejection?
- Wrong physical size: a file can look correct on screen but print smaller or larger than 2×2 inches if the printer scales it.
- Incorrect head height: the face may be centered but still too small or too large inside the official frame.
- Background shadows: a light wall is not enough if there is a dark outline behind the head or shoulders.
- Lens distortion: close selfie shots can enlarge the nose, shrink the ears, or curve the face edges.
How Should You Print or Upload the File?
For printing, export a print sheet at the correct paper size, commonly 4×6 inches, and tell the lab to print at actual size with no scaling, no border adjustment, and no auto-enhancement. After printing, measure the final photo with a ruler before cutting it out.
For online submission, upload the single digital passport photo file rather than a collage or print sheet. Avoid screenshots because they can change resolution, add compression, or include extra pixels around the image. Use the original exported JPG or PNG from the app.
Before submitting, do one final visual check at 100% and 200% zoom. Look at the eyes, hairline, ears, chin, shoulders, and background edge. If anything looks blurry, artificial, shadowed, or misaligned, reshoot rather than trying to rescue the file with more editing.
Related Pict.AI guides for ID photos and headshots
Frequently Asked Questions
A US passport photo is 2×2 inches. The head should generally measure between 1 inch and 1 3/8 inches from chin to top of head.
Yes, you can take a passport photo with a phone if the image is sharp, evenly lit, recent, and taken straight-on. A rear camera usually gives better detail than a selfie camera.
A selfie can work only if it avoids wide-angle distortion, tilted framing, harsh shadows, and low resolution. For better results, have someone else take the photo from eye level.
Many passport photos require a plain white or off-white background. The background should be uniform, shadow-free, and free of objects, patterns, or wall texture.
AI can help convert a regular portrait into a passport-style photo by cleaning the background and cropping it. It should not invent a new face or change your facial features.
Rules vary by country, but many systems reject glasses if there is glare, tint, or frames covering the eyes. US passport photos usually require removing glasses unless there is a medical exception.
Most passport standards require a neutral expression or very slight natural expression. A big smile, open mouth, or visible teeth can cause rejection depending on the authority.
You can print at home if your printer produces accurate size, sharp detail, and correct color on photo paper. Store printing is often easier, but you should disable auto-enhancement and measure the final print.
DIY passport photos are commonly rejected for wrong size, incorrect head scale, shadows, glasses glare, low resolution, old photos, heavy editing, or backgrounds that are not plain enough.