How to Change Eye Color in a Photo With AI
To change eye color in a photo with AI, isolate the iris, protect the pupil and catchlights, then shift hue and saturation gently. The most realistic edits keep the original iris texture, shadows, and reflection pattern instead of painting a flat color over the eye.
Creating your image...
You can change eye color in a photo with AI by masking only the iris, applying a controlled hue shift, and preserving the pupil, catchlights, lashes, and eyelid shadows. For natural results, start with low saturation, keep iris texture visible, and check the edit at 100% zoom for halos or tinted highlights.
What Does AI Eye Color Editing Do in a Portrait?
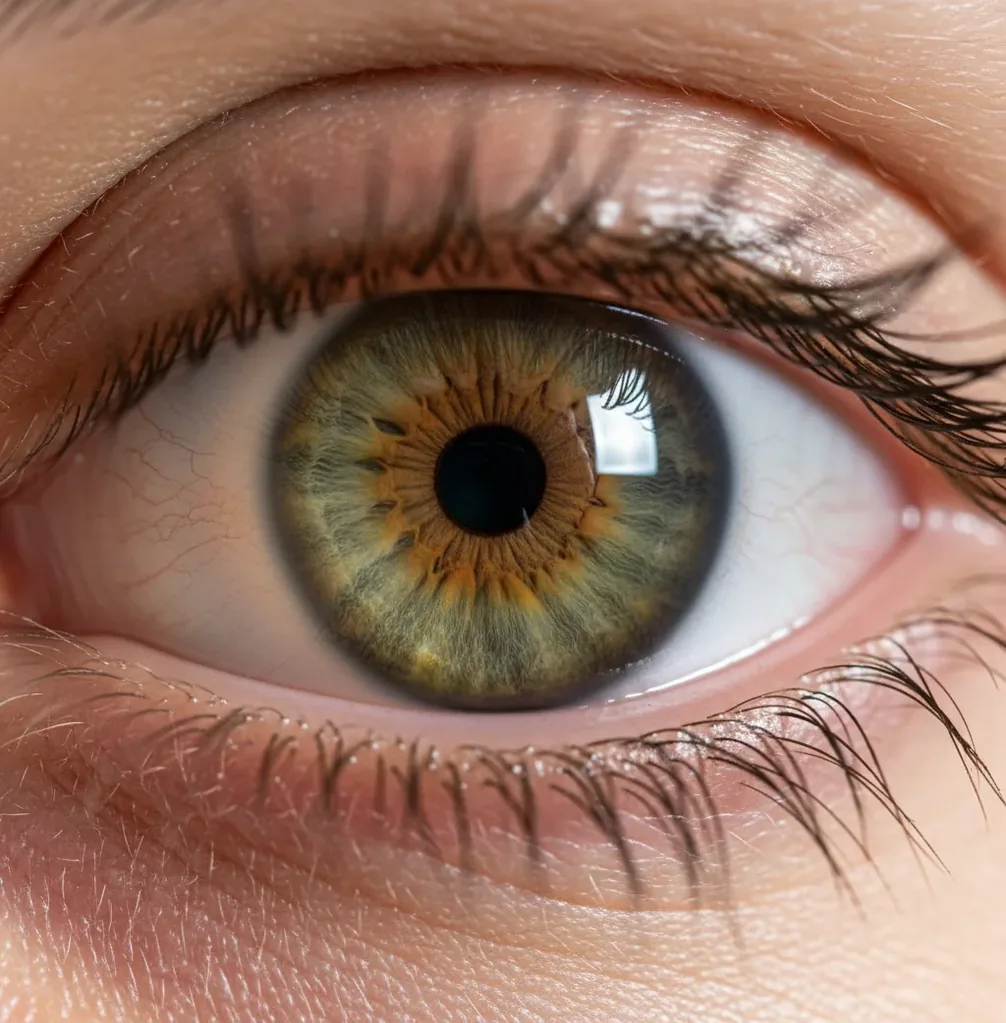
AI eye color editing changes the visible iris color while leaving the rest of the eye structure intact. A realistic edit keeps the black pupil, white catchlights, eyelid shadows, eyelashes, and sclera untouched, so the new color still belongs to the original portrait.
In practice, the editor creates an iris mask, then adjusts hue, saturation, and sometimes luminance inside that mask. This is different from painting over the eye: the goal is to preserve iris striations, radial texture, and natural light falloff. Good edits look useful for social posts, contact-lens previews, cosplay portraits, beauty portfolios, gifts, and subtle profile-photo upgrades.
How Does AI Change Iris Color While Keeping Texture?
AI keeps iris texture by separating the iris from nearby regions, then shifting color channels without flattening luminance. Most tools rely on segmentation, edge detection, and feature extraction to identify the circular iris boundary, the pupil center, catchlights, lashes, and eyelid overlap.
After the mask is created, the color change usually happens in an HSL, HSV, or similar color space. Hue controls whether the eye moves toward blue, green, hazel, gray, or violet; saturation controls intensity; luminance controls brightness. The most believable result preserves the original dark-to-light gradients because real irises are not one solid color.
How Do You Change Eye Color in a Photo With AI?
Choose a sharp portrait
Use a photo where the eyes are in focus, at least 800 px wide, and not heavily blurred by motion, compression, or beauty filters. Visible catchlights and iris texture make the recolor more realistic.
Zoom in and isolate the iris
Open an AI editor such as Pict AI and zoom until the iris edge is easy to see. Mask the colored iris only, excluding the pupil, sclera, eyelids, lashes, and any glass reflections.
Pick a believable target color
Choose a color that fits the original lighting and skin tone. Brown-to-hazel, brown-to-green, blue-to-gray, and green-to-hazel are usually more natural than very dark brown-to-ice-blue.
Lower intensity before increasing it
Start with saturation around 15% to 35% and adjust slowly. If the eye color becomes the first thing people notice, the edit is probably too strong.
Match both eyes separately
Copy the same color settings to both irises, then fine-tune each eye if one side of the face is in shadow. Real portraits often need slightly different brightness on each eye.
Check edges and export
Inspect the image at 100% zoom for colored halos, tinted catchlights, or bleeding into the sclera. Export, then review again at normal social-post size before saving the final version.
Which Tools Can Change Eye Color Realistically?
| Tool type | Best for | Strength | Watch out for |
|---|---|---|---|
| Pict AI | Fast web or iOS iris recoloring | Simple portrait workflow with mask-based eye edits | Still needs careful checking on blurry or low-light eyes |
| Photoshop or Lightroom | Professional retouching and print work | Precise brush masks, layers, curves, and color grading | Slower workflow and steeper learning curve |
| Mobile beauty apps | Quick selfies and social content | Fast presets for blue, green, hazel, gray, or fantasy looks | Can over-smooth iris texture or add a contact-lens effect |
| AI image generators | Stylized portraits, avatars, and character concepts | Can redesign the full eye color as part of a new image | May alter identity, eye shape, skin texture, or facial features |
| Human retouchers | Commercial campaigns, headshots, and print portfolios | Highest control over realism, skin tone, and lighting consistency | More expensive and slower than automated edits |
For realistic eye recoloring, choose the tool based on output quality, masking precision, privacy needs, and whether the image is for casual sharing, portfolio work, or commercial use.
What Settings Make Blue, Green, Hazel, or Gray Eyes Look Natural?
Natural eye-color changes usually use moderate hue shifts and low-to-medium saturation, not full-strength color replacement. For blue eyes, keep luminance slightly lifted and saturation restrained; for green eyes, mix yellow-green with the original brown or gray undertone; for hazel eyes, preserve warm amber near the pupil; for gray eyes, reduce saturation and keep contrast in the iris ring.
A useful working range is 15% to 35% saturation for realistic edits and 40% to 60% for stylized cosplay or fantasy portraits. Avoid turning the entire iris one uniform color. Real eyes have limbal rings, radial streaks, tiny shadows, and uneven pigment, so a believable edit should let some of the original eye pattern show through.
What Prompt Recipes Work for AI Eye Color Edits?
Prompt recipes work best when they describe the iris only, the color target, and what must remain unchanged. Use prompts as editing instructions, not identity-changing commands, and keep them specific about reflections, texture, and lighting.
Realistic green: “Change only the iris color to a natural muted green. Preserve the pupil, catchlights, iris texture, lashes, eyelids, skin tone, and original lighting.”
Subtle hazel: “Shift the iris toward warm hazel with amber and olive tones. Keep saturation low, maintain the limbal ring, and do not color the whites of the eyes.”
Cosplay blue: “Recolor only the iris to bright icy blue for a stylized cosplay portrait. Keep the catchlights white, maintain iris striations, and avoid changing eye shape or facial features.”
Heterochromia: “Make the left iris soft green and the right iris warm brown. Preserve natural shadows, reflections, pupil edges, and matching brightness between both eyes.”
Where Do People Use AI Eye Color Changes?
- Previewing colored contact lenses before buying a blue, green, hazel, gray, or violet pair.
- Creating cosplay portraits, character references, fantasy edits, or themed profile photos.
- Making beauty portfolio variations without scheduling a full reshoot.
- Matching eye color across a creator photo set where lighting changed between shots.
- Fixing muddy or dull-looking eyes in low-light portraits while keeping the face natural.
- Restoring faded iris color in old scanned family photos or printed portraits.
- Testing branding looks for headshots, album covers, thumbnails, and social campaigns.
- Creating personalized gifts, art prints, couple portraits, or pet-and-owner style edits.
Why Do AI Eye Color Edits Look Fake?
- The iris mask bleeds into the sclera, eyelids, lashes, or waterline, creating a colored halo around the eye.
- Catchlights are recolored or blurred, which removes the main visual cue that the eye is glossy and three-dimensional.
- The saturation is too high, making the iris look like a sticker, neon contact lens, or fantasy asset.
- The original photo is too small, compressed, or blurry, so the AI cannot detect a clean pupil edge or iris boundary.
Keep editing: retouching, hair swaps, and full photo upgrades
Frequently Asked Questions
The easiest method is to use an AI photo editor with iris masking, choose a target color, lower saturation, and protect the pupil and catchlights. A sharp, close-up portrait gives the AI the cleanest edge to work with.
Yes, but subtle blue-gray or muted blue usually looks more realistic than icy neon blue. Very dark brown eyes need preserved shadows and iris texture to avoid looking like flat contacts.
Use an iPhone photo editor that supports AI masking or selective eye edits, zoom into the iris, apply the color change, and check the edges before exporting. Avoid one-tap filters that recolor the whole eye area.
Yes. Mask each iris separately, apply different colors, and keep brightness and reflections consistent so the heterochromia effect looks intentional rather than uneven.
It can work if the iris is visible and glare does not cover the eye. Reflections on lenses may need manual masking so the AI does not recolor the glass.
Use a sharp image where the iris is clearly visible and not hidden by motion blur, compression, shadows, or heavy filters. Higher-resolution portraits give cleaner masks and more believable texture.
Preserve the original iris pattern, keep the catchlights white, and avoid uniform color overlays. Lower saturation until the face reads naturally before the new eye color stands out.
No. Eye-color edits should not be used for passports, government IDs, verification checks, or any document where accurate identity representation is required.
Yes, AI edits are useful for previewing general color families like hazel, green, blue, or gray. They cannot perfectly predict how a real lens will look because contacts depend on opacity, pattern, lighting, and your natural iris color.