How to Edit Photos Using Only Text Prompts
You can edit photos with text prompts by uploading an image, typing a direct instruction, and refining the result in short follow-up prompts. This works best for background swaps, lighting fixes, outfit color changes, object removal, product polish, and creative restyling.
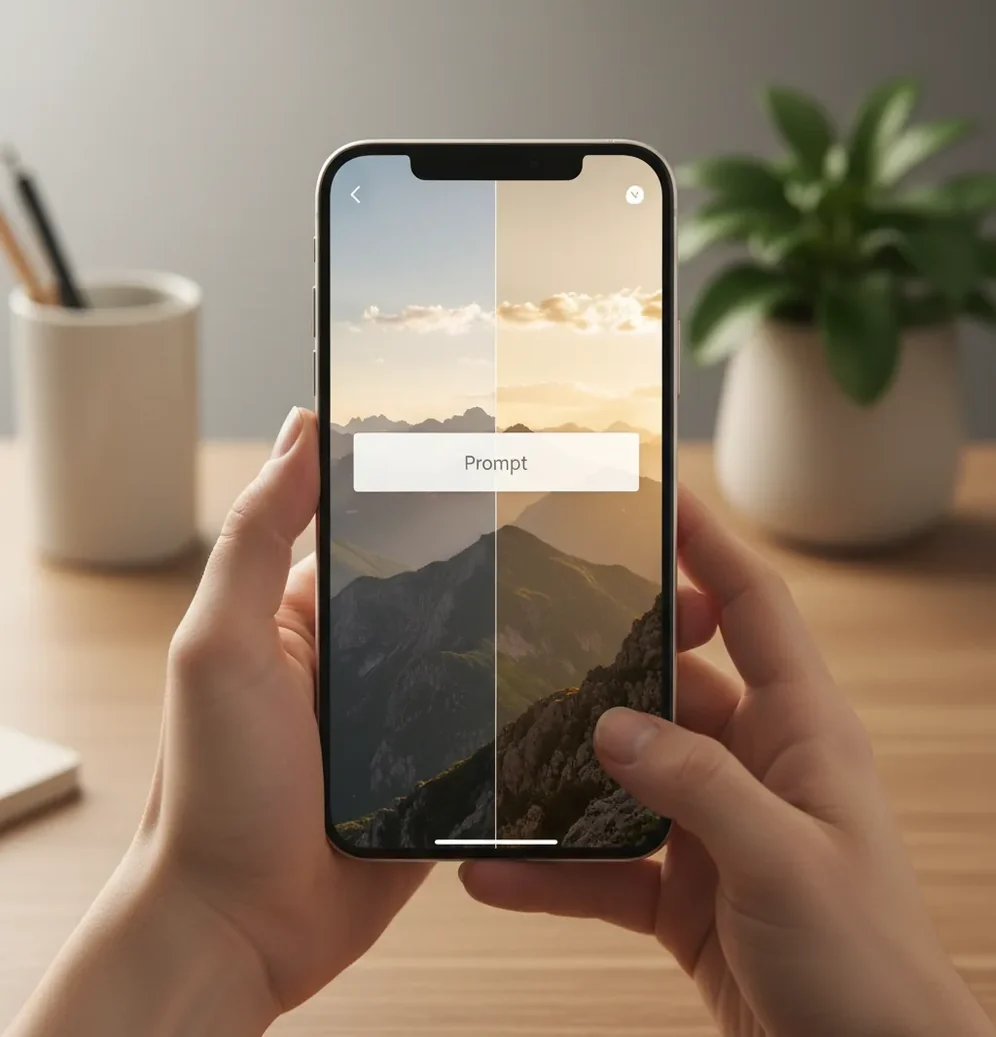
Creating your image...
To edit photos using only text prompts, upload your image to a prompt-based editor, describe exactly what should change, and add what must stay the same. Use short prompts such as “replace the background with a plain beige studio wall, keep the person’s face, pose, and clothing unchanged,” then refine in 2 to 4 passes.
What Does It Mean to Edit Photos With Text Prompts?
Editing photos with text prompts means changing an existing image by writing an instruction instead of manually adjusting sliders, masks, layers, and brushes. The prompt tells the editor what to alter, such as the background, lighting, object color, facial expression, product surface, or overall style.
The key difference from text-to-image generation is that prompt editing starts with a real uploaded photo. The model uses that image as a visual anchor, then modifies selected pixels while trying to preserve identity, pose, perspective, and composition. It is most useful when you know the visual outcome you want but do not want to build the edit manually.
How Does Prompt-Based Photo Editing Work?
Prompt-based photo editing works by converting your written instruction into a guidance signal for a generative image model. The system analyzes the uploaded photo for visual features such as edges, depth cues, faces, fabric texture, objects, lighting direction, and background separation, then uses text-image embeddings to connect your words with the requested visual change.
Most modern tools use some form of image conditioning, inpainting, segmentation, or diffusion-based reconstruction. In simple terms, the editor decides which regions need new pixels and which regions should remain stable. That is why prompts with a clear target area and a preservation clause usually produce cleaner results than broad prompts like “make this look better.”
How Do You Edit a Photo Using Only a Prompt?
Choose one visual goal
Start with a single edit, such as changing the background, softening lighting, removing one object, or making a product image look studio-lit. One goal per prompt gives the model a clearer target and makes the result easier to judge.
Upload the cleanest source image
Use the highest-resolution version you have, ideally with the subject in focus and not heavily compressed. If the horizon, crop, or framing is obviously wrong, fix that first so the prompt edit does not waste effort reconstructing basic composition.
Write the change and the preservation rule
A strong prompt includes what to change and what must stay unchanged. For example: “Replace the busy café background with a soft gray studio backdrop, keep the woman’s face, hair, pose, and jacket unchanged.”
Refine with short follow-up prompts
Review the result at full size, then ask for one correction at a time. Use follow-ups like “make the shadows softer,” “restore the original hairline,” or “reduce the blur on the product label.”
Check edges before export
Zoom to 100% around hair, glasses, fingers, jewelry, logos, and object edges. These are the areas where halos, warped details, or texture loss usually appear after AI edits.
Export a new version
Save the edited image as a separate file instead of overwriting the original. For social posts, export in the platform’s target ratio; for prints or portfolios, keep the highest available resolution and avoid repeated heavy restyling.
Which Photo Editors Support Text-Prompt Editing?
| Tool | Best for | Prompt editing style | Precision controls | Good fit |
|---|---|---|---|---|
| Pict AI | Fast web and iOS prompt edits from existing photos | Upload, type an edit, refine, export | Prompt-first with enhancement options | Creators who want quick background, lighting, and style changes |
| Adobe Photoshop | Professional compositing and commercial retouching | Generative Fill and typed instructions inside a layer-based workflow | Strong masks, layers, selections, and manual cleanup | Designers who need pixel-level control and print-ready files |
| Canva | Social graphics, thumbnails, and simple brand visuals | AI editing inside a template and design workspace | Moderate controls with layout tools | Creators making posts, stories, flyers, and lightweight marketing assets |
| Pixlr | Browser-based quick edits and casual creative changes | AI-assisted edits mixed with standard web editor tools | Basic to moderate controls | Users who want lightweight editing without a full desktop app |
| Runway | AI-native image and video experimentation | Prompt-driven visual generation and editing workflows | Varies by feature and model | Creators exploring stylized visuals, motion, and campaign concepts |
The best editor depends on the job. Prompt-first tools are faster for visual changes described in language, while layer-based editors are better when you need exact masks, typography, print specifications, or client approval files.
What Prompt Recipes Work Best for Photo Edits?
- Background swap: “Replace the background with [new setting], keep [subject] unchanged, preserve the original camera angle and natural shadows.” Example: “Replace the messy bedroom with a clean cream studio wall, keep the person’s face, hair, pose, and sweater unchanged.”
- Lighting fix: “Adjust the lighting to [lighting style], keep skin texture natural, avoid changing facial features or clothing color.” Example: “Make the lighting soft golden-hour sunlight from the left, keep the original face and outfit unchanged.”
- Object removal: “Remove [object] from [area], fill the space naturally with matching texture, keep nearby edges intact.” Example: “Remove the passerby behind my shoulder and fill the background with matching beach and sky.”
- Product polish: “Make this product photo look [style], keep the product shape, logo, label text, and color accurate.” Example: “Make this skincare bottle look studio-lit on a matte white surface, keep the label text sharp and unchanged.”
- Outfit or color change: “Change only [item] to [color/material], preserve folds, seams, shadows, and body shape.” Example: “Change only the blue jacket to dark forest green, keep fabric wrinkles and zipper details realistic.”
- Style transfer: “Apply a subtle [style] look, keep the photo realistic and preserve identity, anatomy, and texture.” Example: “Give this portrait a subtle 35mm film look with fine grain and soft contrast, keep the face natural.”
What Photo Edits Can You Realistically Make With Typed Instructions?
Text prompts are strongest for edits that can be described visually: replacing a cluttered background, warming indoor light, removing a distracting object, changing an outfit color, adding product-style shadows, improving a dating profile portrait, or creating a consistent look for social posts. They are also useful for mood changes, such as making a photo feel cinematic, minimal, cozy, editorial, or more polished.
For creators, the practical value is speed. A prompt can turn a casual phone shot into a cleaner image for an Instagram carousel, LinkedIn headshot, gift print, shop listing, portfolio mockup, or brand campaign draft. The best results still come from realistic requests that respect the original photo’s angle, lighting direction, and resolution.
How Do You Get Cleaner Results From Prompt Photo Editing?
- Use concrete visual words. “Soft daylight on a plain white wall” is easier for a model to apply than “make it aesthetic.”
- Add a preservation clause. Phrases like “keep the face, pose, framing, and clothing unchanged” reduce unwanted identity and composition changes.
- Edit in passes. Run background, lighting, color, and style changes separately instead of asking for all of them in one long prompt.
- Mask when the tool allows it. A rough selection around the background, jacket, sky, or object gives the model a smaller region to reconstruct.
- Stay realistic with lighting. If the original photo has hard noon sun, asking for candlelit indoor shadows can create inconsistent faces and fake edges.
- Check important details at 100% zoom. Hair, glasses, hands, logos, jewelry, product labels, and small text are the first places AI artifacts show.
- Keep an untouched original. Versioning lets you compare edits, recover accurate details, and avoid quality loss from repeated reprocessing.
When Should You Use Manual Tools Instead of Text Prompts?
- Use manual tools when the edit requires exact geometry, such as straightening architecture, aligning product edges, matching brand layout grids, or preparing a file for print bleed.
- Use manual retouching for tiny details like eyelashes, teeth edges, jewelry highlights, transparent glass, complex hairlines, and reflections. Prompt edits can blur or reinterpret these areas.
- Avoid heavy prompt edits on very small or compressed files. If the source is under roughly 1024 pixels on the long edge, the model may invent texture instead of preserving real detail.
- Be careful with readable text. Small logos, labels, signs, packaging copy, and document text may warp during generative edits unless the tool has strong text-preservation controls.
How Should You Write a Single Prompt for a Complete Edit?
A complete prompt should name the target area, the requested change, the realism level, and the details to preserve. The most reliable structure is: “Change [specific area] to [new visual result], keep [protected details] unchanged, preserve [lighting/perspective/texture], avoid [unwanted artifact].”
Example for a portrait: “Replace the background with a warm neutral studio backdrop, keep the person’s face, hair, pose, and black jacket unchanged, preserve natural skin texture and soft shadows, avoid plastic skin or blurred edges.” Example for a product: “Make the candle photo look like a clean e-commerce studio shot on a matte beige surface, keep the label text, glass shape, and wax color accurate, add a soft shadow underneath.”
Keep learning: nearby guides that pair well
Frequently Asked Questions
Yes. A prompt-based editor can modify an uploaded photo from written instructions, especially for backgrounds, lighting, object removal, color changes, and style adjustments.
The best prompt states what to change and what to preserve. A strong format is: “Change [area] to [result], keep [subject details] unchanged, preserve realistic lighting and texture.”
Text prompts can replace many quick edits, but they do not fully replace manual tools for precise masking, typography, compositing, print layout, or detailed retouching.
Upload the image and write a prompt such as “replace the background with a plain white studio wall, keep the person, hair, pose, and natural shadows unchanged.” Check edges at full size afterward.
Yes, object removal works well when the object is clearly separated from the subject. Crowded scenes, overlapping limbs, shadows, and reflections may need masking or manual cleanup.
It can if the source image is small, blurry, or repeatedly regenerated. Use the highest-resolution original, make fewer heavy edits, and export at the largest available size.
Faces can change when the prompt is too broad, the style is too strong, or the model reconstructs identity-sensitive pixels. Add “keep the face and expression unchanged” and use smaller edits.
Most clean edits take 2 to 4 short prompts: one main change, one correction, one detail pass, and sometimes one export polish pass.
Commercial use depends on the tool’s license, the source image rights, and whether people, trademarks, or copyrighted elements appear in the photo. Always check usage terms before publishing or selling.