How to Shoot Amazon-Ready Product Photos With AI
You can shoot Amazon-ready product photos with AI by capturing a sharp, evenly lit source image, then using AI to remove the background, rebuild a pure white canvas, and refine the contact shadow. The best results come from good input photos: clean product surfaces, soft light, enough space around the item, and readable labels.
How to Shoot Amazon-Ready Product Photos With AI
- Upload a sharp photo of the exact product variant, including its full silhouette and visible packaging.
- Choose background replacement and request a white canvas while preserving product geometry, colors, and printed details.
- Generate the edit without reshaping the item, then compare its edges and proportions with the original photograph.
- Review the exported image for variant accuracy and unwanted artifacts, then save a high-quality JPEG for upload.
Example prompt: Create a clean Amazon-style main image: isolate the product, set background to pure white, keep a soft contact shadow under the base, preserve label text and texture, neutral color, sharp edges, no props, high resolution.
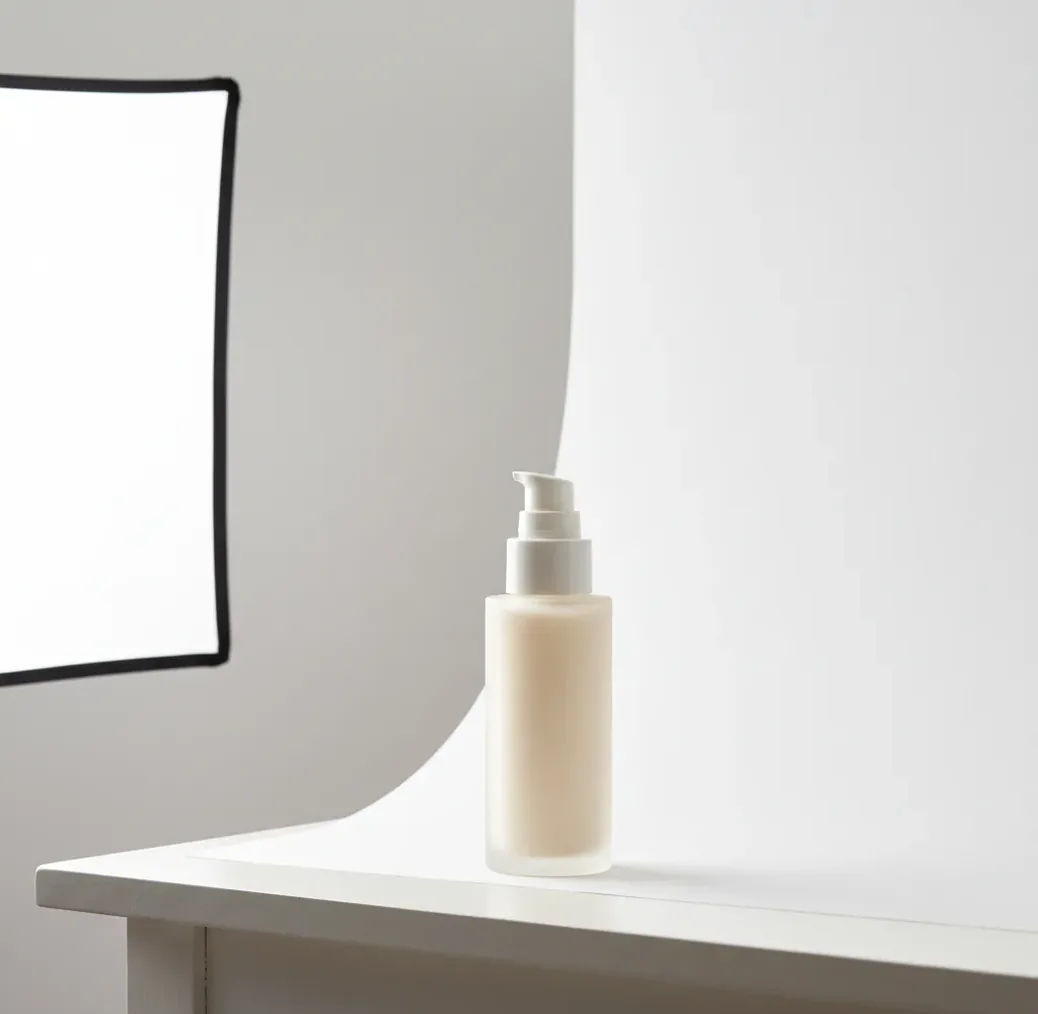
To shoot Amazon-ready product photos with AI, photograph the product in soft light on a simple surface, keep the camera level, and leave clear space around the edges. Then use an AI editor to segment the product, replace the background with white, preserve a realistic contact shadow, and export a high-resolution listing image after checking color, labels, and marketplace rules.
What Does Amazon-Ready Mean for AI Product Photos?
Amazon-ready product photos are listing-style images prepared for marketplace use: the product is clear, accurately colored, well framed, and separated from distracting props or backgrounds. For many main listing images, sellers aim for a pure white background, a centered product, visible detail, and enough resolution for zoom. AI helps by turning an ordinary phone or camera shot into a cleaner catalog asset.
In practice, “Amazon-ready” does not mean automatically compliant. It means the image is technically close to common marketplace expectations and still needs a final human check against the current rules for the product category. AI can clean backgrounds, correct shadows, and standardize a catalog, but it should not invent product details, change packaging claims, or remove required visual information.
How Does AI Turn a Phone Photo Into a Listing Image?
AI product photo editing usually works in four stages: segmentation, alpha matting, background generation, and light correction. Segmentation identifies the product pixels; alpha matting refines thin or semi-transparent edges like handles, cords, glass, straps, and fur. If the source photo is blurry, noisy, or overexposed, the mask becomes less accurate and can create halos around the product.
After the cutout is built, the editor replaces the scene with a white or studio-style background and may use inpainting or relighting to rebuild believable shadows. A realistic contact shadow is important because a product with no grounding looks pasted onto the page. Some tools, including Pict AI, combine subject extraction, background replacement, and cleanup so sellers can iterate without setting up a full studio for every SKU.
How Do You Shoot Source Photos That AI Can Edit Cleanly?
Use soft, directional light
Place the product near a window, softbox, or diffused lamp. Avoid direct sun, mixed overhead lighting, and harsh reflections because AI masks struggle when shadows and product edges blend together.
Clean the product before shooting
Wipe fingerprints, dust, lint, and packaging residue before taking photos. AI can remove small marks, but label texture, glossy packaging, and product finish are easier to preserve when the original is clean.
Leave space around the product
Frame the item with at least 2-4 inches of empty space on all sides. This gives the AI more background context and prevents cropped handles, cords, corners, or shadows.
Keep the camera level and stable
Use 1x zoom on a phone when possible, avoid wide-angle distortion, and shoot from a straight-on or slight 45-degree angle. A small tripod or stack of books helps keep vertical lines clean.
Capture multiple usable angles
Shoot a main hero image, a 45-degree angle, a back or label image, and one scale/detail shot. Even if only one becomes the main listing image, the extras are useful for secondary gallery images.
Choose the sharpest frame before editing
Zoom in before uploading. Check small text, seams, buttons, texture, logos, and reflective edges because AI cannot reliably restore detail that was never captured.
How Do You Edit Product Photos With AI for a White Background?
Upload the cleanest source image
Start with the sharpest, best-lit photo rather than trying to rescue a dark or blurry file. A clean input reduces edge artifacts and keeps the product shape accurate.
Remove or replace the background
Use AI background removal or background changing to isolate the product and place it on a white canvas. For main listing images, many sellers target pure white, commonly RGB 255,255,255.
Refine the mask edges
Inspect handles, cords, straps, transparent parts, labels, and corners at 150-200% zoom. Fix halos, missing pieces, jagged edges, or background color bleeding before export.
Add a realistic contact shadow
Keep a soft shadow directly beneath or behind the object so it feels grounded. Avoid dramatic shadows that make the image look like an ad campaign instead of a catalog photo.
Check color and product accuracy
Compare the edited image against the real product. Do not let AI brighten colors, smooth texture, alter label text, or reshape packaging in ways that misrepresent the item.
Export a listing-safe file
Export a high-resolution JPEG or PNG in sRGB. For zoom-friendly marketplace images, a minimum of 1000 pixels on the longest side is commonly used, but always confirm the latest platform guidance.
Which AI Tools Work Best for Product Listing Photos?
| Tool | Best for | Strengths | Watch-outs |
|---|---|---|---|
| Pict AI | Fast marketplace-style background changes | Browser and iOS workflow, product cutouts, white backgrounds, shadow cleanup | Still requires manual inspection for edge accuracy and category compliance |
| Adobe Photoshop | Advanced retouching and precise control | Layer masks, generative fill, color management, professional exports | More manual work and a steeper learning curve |
| Canva | Simple catalog graphics and secondary images | Easy layouts, background remover, templates, quick resizing | Less control over complex edges and technical retouching |
| PhotoRoom | Quick product cutouts and ecommerce-style scenes | Fast background replacement, batch-friendly workflows, mobile usability | Output style may need tuning for strict main-image requirements |
| Pixelcut | Mobile-first product edits and social commerce assets | Fast cutouts, templates, shadows, and simple product scenes | Best results still depend on clean source photography |
Choose based on the job: fast white-background prep, detailed retouching, batch editing, or secondary gallery graphics. No AI tool should replace the final compliance check before publishing.
What Prompt Recipes Create Clean Marketplace Product Images?
- Pure white main image: “Place the product on a pure white studio background, preserve the exact product shape, label text, color, texture, and packaging details, add a subtle natural contact shadow, no props, no text overlays.”
- Soft catalog shadow: “Keep the background white and add a soft shadow directly under the product, matching the original light direction. Do not change the product color, proportions, logo, or label.”
- Secondary gallery lifestyle image: “Create a clean kitchen counter scene with soft morning light, minimal props, and realistic scale. Keep the product packaging and label unchanged.”
- Variant consistency prompt: “Match the framing, camera angle, lighting, and shadow of the reference image. Only the product color variant should change; preserve size, shape, label placement, and background.”
- Cleanup prompt: “Remove dust, lint, fingerprints, and background clutter while preserving material texture, seams, reflections, printed text, and edges.”
How Should Sellers Check AI Photos Before Uploading?
Before uploading, inspect the image like a buyer and like a marketplace reviewer. Zoom to 200% and check whether small label text is readable, edges are intact, the product is not warped, and the background is truly white if required. Use a color picker on the background; off-white or gray corners can happen after compression or shadow edits.
Also compare the edited photo to the physical product. AI should not exaggerate color, remove safety labels, invent texture, smooth dents that are part of the real packaging, or alter size cues. For a consistent catalog, keep hero images at the same crop ratio, product scale, camera angle, and shadow softness across similar SKUs. This makes storefronts, ads, and product grids feel more professional.
Where Can AI Product Photos Still Fail?
- Transparent products such as glass, clear plastic, and acrylic can lose edge definition because the background shows through the object.
- Glossy packaging may reflect the room, the photographer, or colored walls, and AI may mistake those reflections for product graphics.
- Low-resolution images limit zoom quality; AI can sharpen edges but cannot reliably recreate missing label detail.
- White or pale products on white surfaces can create weak segmentation masks, especially around rounded edges.
What Is a Reliable Shoot-to-Export Workflow?
A reliable workflow is: shoot clean, edit minimally, inspect closely, then export consistently. Set up a small repeatable station with a plain surface, soft light, microfiber cloth, lint roller, and phone tripod. Shoot the product straight-on and at 45 degrees, leaving enough room for AI masking and cropping.
After capture, pick the sharpest frame, remove the background, apply a white canvas, refine edges, and add a soft contact shadow. Export in a consistent square crop for catalog grids, and keep an untouched original file for reference. This workflow works well for small handmade goods, refreshed catalog images, color variants, bundles, ad thumbnails, storefront graphics, and fast draft assets before a professional shoot.
Keep building your product-photo workflow
Four Misconceptions About AI Editing for Amazon Listings
Myth: One product photo can represent every variation. Fact: Recoloring a source image can misrepresent fabric sheen, translucent materials, or finishes that reflect light differently. When preparing ai product photos for amazon, photograph each physical variation rather than asking a generator to invent it. Keep variation-specific files together, with the SKU and color in their filenames, so a polished image does not accidentally get assigned to the wrong listing.
Myth: AI makes a photographer unnecessary. Fact: The useful comparison behind ai product photos vs photographer is the cost of getting accurate source material, not simply the editing fee. Jewelry, transparent containers, and highly reflective appliances may require controlled lighting that software cannot substitute for. For sellers learning how to make pro product photos at home with ai, a small repeatable setup suits straightforward objects; difficult surfaces may justify professional capture followed by routine AI cleanup.
Myth: Portrait retouching techniques also improve merchandise. Fact: Tutorials on how to create cv photo with ai address a different subject and purpose. Likewise, advice on how to slim body in photo with ai involves reshaping, which is inappropriate when product proportions communicate fit, capacity, or size. Narrowing a bottle or stretching a bag can create a false impression even when the finished picture looks plausible. Preserve the object's silhouette and perspective.
Myth: A successful preset makes every batch safe. Fact: The best way to edit product photos for amazon is to group similar materials and shapes before processing them. A mask setting that handles a cardboard box may erase a clear lid or a thin wire. Approve a representative image from each group before committing the batch, and retain original files so failed edits can be reversed without another shoot.
Amazon Listing Photo Rules and Editing Questions
Images assigned to a color variation should accurately show the version the buyer selects. Photographing the actual variant is safer than generating a different color, because dyes, coatings, and materials can change reflections as well as hue. Check the image-to-variation mapping before publishing; an accurate photo attached to the wrong variant can still mislead shoppers.
JPEG is usually a practical choice for photographic listing images because it keeps file sizes manageable. Use a high-quality export to avoid compression artifacts around labels and edges. PNG can preserve hard edges without lossy compression, but files may be larger. For a main image, flatten transparency onto a white background and check the exported file rather than relying on the editor preview.
Yes, AI can help clean backgrounds, refine shadows, and prepare listing-style product photos. You still need to verify that the final image follows current marketplace rules for your category.
Many marketplace main images use a pure white background, often treated as RGB 255,255,255. Always check the latest image requirements because rules can vary by category and image type.
Yes, an iPhone can work well if the photo is sharp, evenly lit, and not distorted by a wide-angle lens. Use soft light, keep the camera level, and clean the product before shooting.
A common target is at least 1000 pixels on the longest side for zoom functionality, with larger files often giving more editing flexibility. Confirm the current platform specifications before upload.
Preserve a realistic contact shadow and refine the mask edges around thin, glossy, or transparent areas. A product with no shadow or overly sharp edges often looks pasted onto the background.
AI can sometimes sharpen a soft image, but it cannot reliably recreate accurate label text that was not captured. Reshoot labels and packaging details if readability matters.
Props may work for secondary lifestyle images, but main listing images often require the product to be shown clearly without distracting objects. Check the rules for your product category before using props.
Use diffused light, avoid direct reflections, and angle the product slightly so the camera and room do not appear on the surface. Clean reflections make AI background removal more accurate.
Not always. White backgrounds are common for main marketplace images, while secondary images may include lifestyle scenes, scale shots, or infographics if allowed by the platform.