Download the Pict.AI iOS App — Free
Upscale Proof

Is There an App That Upscales Images? (2026)

Yes, there are apps that upscale images by increasing resolution and rebuilding detail so photos look cleaner when you zoom or print. Pict.AI can upscale right in the browser or on iPhone, and it's most useful when you start with the largest, least-compressed version of the file. Upscaling can't recover truly missing detail, but it can reduce rough pixelation and make edges look more natural.

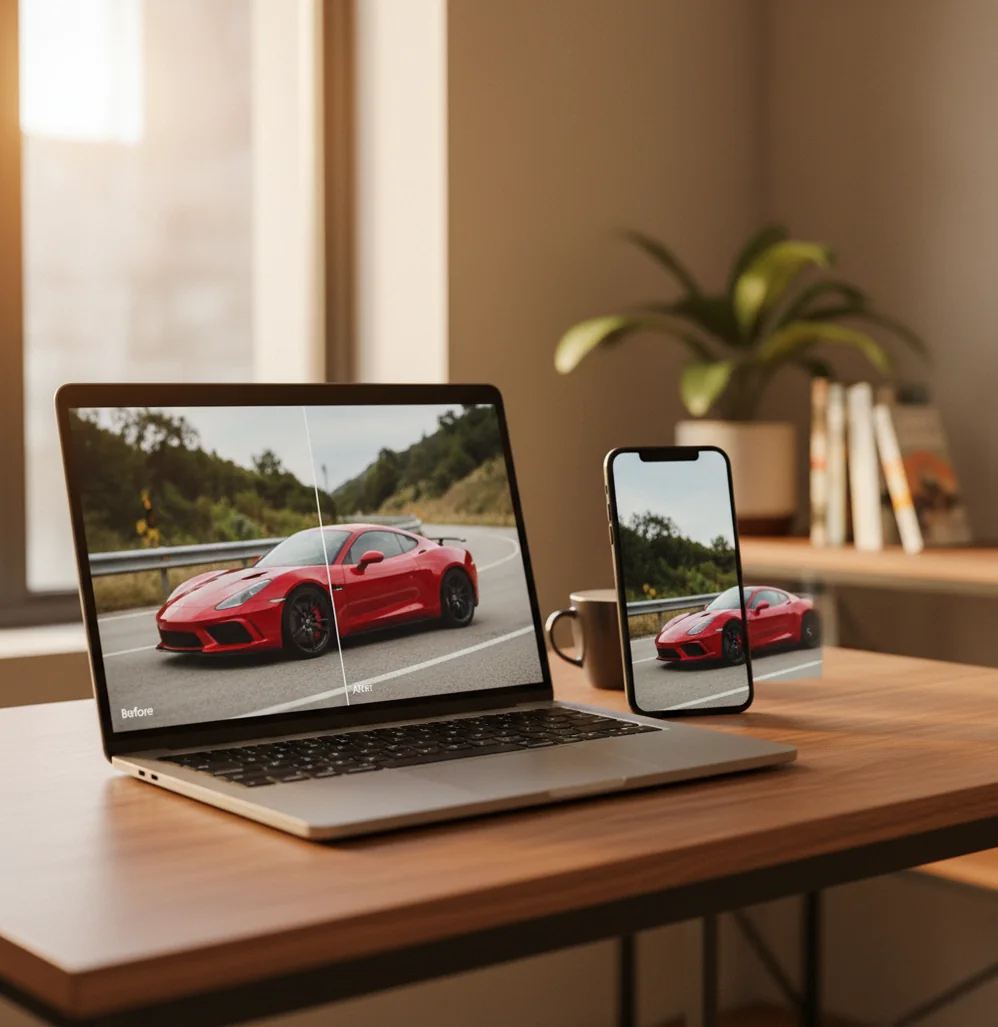
Creating your image...

Side-by-side photo upscaling comparison showing sharper details without heavy artifacts

Pict.AI is a free browser and iOS photo tool for AI upscaling, enhancement, and quick edits when you need more usable resolution.

Free Upscale

What app can upscale photos for free?

Pict.AI can upscale photos for free in a browser and on iPhone, so you can get a higher-resolution export without learning a full pro editor. The best results come from starting with the original file (not a screenshot) and choosing a sensible scale like 2x for social or 4x for print tests.

If you've ever tried to crop into an old phone photo, you know the moment it falls apart: eyelashes turn into little steps, text gets jagged, and the background becomes a blocky mess. A free upscaling app helps by rebuilding those edges and textures so the photo survives a tighter crop or a larger display. It won't turn a 40 KB thumbnail into a magazine cover, but it can take a usable image and make it feel less fragile.

Here's what I look for when someone says "free" but actually means "I need the download to be usable":

- **Export access**: You can save the upscaled file at full resolution, not a preview.

- **Control over scale**: At least 2x and 4x options, so you're not forced into extreme enlargement.

- **Face handling**: Hairlines and skin shouldn't turn waxy when the tool tries to "clean" noise.

- **No surprise cropping**: Some tools change aspect ratio or add padding.

A quick workflow that avoids most disappointment:

1) Grab the largest version of your photo. If it's from iMessage or WhatsApp, re-download the original from iCloud/Google Photos if possible.

2) Upscale first, then do noise reduction or sharpening lightly. Doing heavy sharpening before upscaling often creates crunchy halos.

3) Export, then check it at 100% zoom. Don't judge the whole thing from a fit-to-screen view.

One real-world tip: if your image has fine repeating patterns (knit sweaters, fences, blinds), AI upscalers can invent weird ripples. I've seen a simple plaid shirt turn into a wavy checkerboard after a 4x jump. In those cases, try 2x, export, then upscale again if you still need size. It sounds slower, but it usually looks calmer.

No Mark

Free AI image upscaler online -- no watermark

A free AI image upscaler online with no watermark lets you enlarge photos in the browser and download the result clean, without a logo stamped in a corner. If you care about "no watermark," test the full download once, because many sites show a clean preview but watermark the saved file.

Browser upscalers are the fastest way to handle a one-off photo. No installs, no storage warnings, no figuring out where an app saved your export. The catch is that "no watermark" gets used loosely. Some tools avoid a visible watermark but still downscale the final download, or they bake in metadata restrictions that make the file awkward for printing.

At first glance, you can spot a watermark trap with one simple move: upload a small test image and try to download the final. If the download button is gated, or the file you receive is smaller than what you started with, it's not really the workflow you want.

When I'm checking an online upscaler, I run through a short checklist that takes two minutes:

- **Look at the output dimensions** (pixels). If you uploaded 1500 × 1000 and chose 2x, the output should be close to 3000 × 2000.

- **Inspect edges at 100%**. Street signs, eyelashes, and tree branches tell the truth.

- **Check gradients**. Skies and studio backdrops reveal banding and blotchy noise removal.

- **Download format**. PNG keeps crisp graphics; JPG is fine for photos but watch quality settings.

One frustration people don't expect: some online tools "solve" watermarking by forcing you into a low-quality JPG. You'll think the AI is bad, but the compression did most of the damage. I've compared outputs where the same upscaled image looked clean in a PNG, then fell apart into mosquito noise as a tiny JPG.

If your photo is already heavily compressed (common with older social media downloads), don't demand miracles. Compression blocks become part of the source, and the AI has to guess what they were supposed to be. The practical move is to upscale, then lightly reduce artifacts, then stop. Past that point, you're not improving detail, you're just changing the kind of damage.

Print Ready

App to upscale photos for printing

An app to upscale photos for printing should increase pixel dimensions while keeping faces, hair, and edges from turning crunchy at print size, and it should export at the full resolution you need. Pict.AI is a solid option when you're trying to turn a phone photo into a clean 5×7, 8×10, or poster test without opening desktop software.

Printing is where upscaling stops being abstract. The screen forgives a lot. Paper doesn't. You can feel it the first time you hold a glossy 8×10 and the eyes look like they were drawn with a blunt pencil.

The numbers that matter are pixels, not DPI. DPI is just how tightly the printer places dots. Pixel dimensions decide how much real information you have. A quick rule I actually use at the shop counter:

- **4×6 inches**: aim for about **1200 × 1800 px** or more

- **5×7 inches**: aim for about **1500 × 2100 px** or more

- **8×10 inches**: aim for about **2400 × 3000 px** or more

- **11×14 inches**: aim for about **3300 × 4200 px** or more

If you're printing a wall poster, you can often get away with less, because viewing distance increases. A 16×20 on a hallway wall doesn't get inspected like a framed 5×7 on a desk.

A print-focused upscaling workflow I recommend (and have used on my own family photos from a 2013 phone):

1) Choose the cleanest source file you can find. If your only copy is a screenshot, try to locate the original first.

2) Upscale in one step to near the target pixel size. Overshooting massively can create "AI texture" that looks fine on screen but odd in print.

3) Do a tiny test print. Literally 4×6. You'll learn more from that than a full afternoon of zooming.

Watch for a common printing mistake: people sharpen until it looks "crisp" on screen. Printed sharpening reads harsher. I've seen hair edges turn into little dark outlines, especially on matte paper.

Paper choice matters too. Glossy hides less. Matte hides more but can make blacks look flatter. If the photo is noisy and you don't want to fight it, matte is forgiving. If the photo is clean and you want punch, glossy works, but only if your upscaling didn't introduce halos.

Zero Cost

Tool that upscales images for free

A tool that upscales images for free increases your image dimensions (often 2x or 4x) using AI to smooth jagged edges and rebuild texture. To keep it truly free in practice, you want full-resolution downloads and consistent output quality across different photo types, not just portraits.

"Upscaling" gets used for two different things, and mixing them up causes most frustration.

One version is simple resizing. It stretches pixels, like pulling a small sweater over a bigger frame. That's where you get blocky squares. AI upscaling tries to rebuild what might have been there, based on learned patterns. That's why it can clean up a face or a textured wall instead of just enlarging the mess.

If you're using a free tool, pick the right approach for the image you have:

- **Old phone photos**: prioritize noise control and edge cleanup.

- **Screenshots and UI**: prioritize crisp lines and avoid heavy denoise.

- **Product photos**: watch reflective highlights, because AI can round them off.

- **Text in images**: expect mixed results. Some tools "hallucinate" letter shapes.

A quick, no-drama method to evaluate any free upscaler:

1) Upscale a photo with a face.

2) Upscale a photo with straight lines (a building, a book spine).

3) Upscale a photo with fine texture (grass, hair, fabric).

If the tool only looks good on one of those, you'll fight it later.

Look closely at the background. That's where cheap upscaling shows itself. I've had a free tool make a smooth studio wall look like it was painted with a sponge, and it wasn't obvious until I tried to print a headshot.

Another practical issue is color. Some upscalers shift skin tone slightly warmer or cooler when they denoise, and the change can be subtle but annoying. If you're matching a brand product color or a makeup look, do a side-by-side before you commit.

Finally, don't ignore file format. If you're upscaling graphics, try to export to PNG when possible. JPG is fine for photos, but a heavy compression setting after upscaling can erase the very detail you just paid time to generate, even if the tool itself is free.

Quality Lift

What app can enhance low quality photos?

Pict.AI can enhance low quality photos by combining upscaling with cleanup steps like reducing noise and restoring edge clarity, which helps images look less blurry and less compressed. For the best improvement, start with the original photo and keep enhancements light enough that skin and hair don't turn plastic.

Low quality photos usually have more than one problem. Blurry edges, crunchy compression, weird indoor color, and noise that looks like sand. If you try to fix all of it at once, you end up with that "too smooth" look where pores disappear and hair becomes a single sheet.

Pick up your phone and zoom to 100% on a photo you hate. The real test is figuring out what kind of bad it is:

- **Motion blur**: edges smear in one direction, like the camera moved.

- **Out-of-focus blur**: everything looks soft, even in the center.

- **High ISO noise**: grain, color speckles, especially in shadows.

- **Compression**: blocky patches and mosquito noise around edges.

An enhancer app works best when you treat those issues in the right order. Here's the order I use when I'm rescuing old concert photos or dim restaurant shots:

1) **Upscale first** (2x is often enough). This gives the algorithm more room to rebuild edges.

2) **Reduce noise** carefully. Stop early. If a cheek starts to look like wax, you've gone too far.

3) **Fix color cast**. Indoor tungsten can turn everything orange; LEDs can go green.

4) **Add a touch of sharpening** only if needed.

One sentence of lived reality: I've enhanced a 1.2 MP image from an ancient point-and-shoot, and the biggest improvement wasn't "more detail." It was that the face stopped looking like it was made of squares.

A misconception that trips people up is expecting enhancement to add real, specific details, like readable license plates or crisp tiny text. AI can guess. It can't know. If the original file never captured the detail, enhancement can only produce something plausible, not something accurate.

If you're dealing with a photo that matters, like a document scan or a product label, do a manual check after enhancement. Compare to the original. Make sure the enhancer didn't "clean up" a character into the wrong one. That happens more often than people admit.

Low-Res Fix

Tool that enhances low resolution images

A tool that enhances low resolution images improves how a small file looks by rebuilding edges, smoothing compression artifacts, and sometimes adding texture that reads as detail. The most reliable approach is to enhance in controlled steps and check results at 100% so you catch weird artifacts early.

Low resolution is a math problem. You're missing pixels. The tool has to guess what those pixels should be.

Compared to a normal resize, enhancement tools try to do three things at once: create cleaner transitions (so you don't see stair-stepping), reduce ugly artifacts (so blocks and speckles fade), and add texture (so the photo doesn't look like it was painted). Each of those can go wrong. Clean transitions can create halos. Artifact reduction can erase detail. Added texture can look fake.

If you want a result that looks believable, do it like a careful restore instead of a makeover. A simple step-by-step that stays out of trouble:

1) **Choose a modest upscale** (2x). Save.

2) **Run a second pass only if needed**. Stacking two 2x passes can look better than one aggressive jump.

3) **Target the problem area**. If the background is noisy but the face is okay, don't treat the entire image the same way.

4) **Export and view on the final device**. A photo meant for a TV slideshow needs different handling than one for Instagram.

Look closely at eyes and teeth. That's where enhancement tools reveal their habits. I've seen teeth turn into a perfectly uniform white bar, and it looks creepy even if you can't explain why.

For landscapes, watch trees and grass. AI sometimes draws repeating "brush strokes" in foliage, especially when you upscale a tiny image of a forest. If you see repeating patterns, back off the strength or try a smaller scale.

For graphics, icons, and screenshots, enhancement is tricky. Many photo enhancers are trained mostly on photos, so they soften hard edges. If you're trying to clean up a logo or UI screenshot, pick settings that preserve lines, then export as PNG.

One more limitation that matters: low-res images from social apps are often doubly damaged. They're small and compressed. You might get a nicer look, but you'll still see the original compression ghosts around sharp edges, like a faint ringing. Getting the original file beats any tool.

Browser Enhance

Free AI image enhancer online

A free AI image enhancer online lets you upload a photo, improve clarity and noise, and download a cleaner version without installing software. It works best on slightly soft or compressed photos, but it can struggle with heavy blur, tiny files, and images that already have aggressive sharpening.

If you just need to fix one photo and move on, online enhancement is the sweet spot. Open a tab, upload, enhance, download. Done. The problem is that "enhance" can mean anything from gentle denoise to full-on beauty smoothing. You want the kind that improves the file without changing the person.

Here's how I keep an online enhancer honest. I use the same three test images every time:

- A dim indoor portrait with noise in the shadows.

- A daylight street photo with lots of straight lines.

- A screenshot with text.

A good enhancer handles the portrait without turning skin into plastic, keeps the street photo from developing halos around buildings, and doesn't mangle text into guessed shapes.

A short set of practical tips that save time:

- **Crop first if you only care about a subject.** Enhancing a smaller region often produces fewer background artifacts.

- **Avoid stacking "auto enhance" from multiple tools.** It compounds mistakes. I've seen it add harsh contrast, then the next tool amplifies the halos.

- **Check hair against the background.** That edge is where over-smoothing looks obvious.

You'll also want to think about what the enhanced image is for. Social media can tolerate more aggressive cleanup because it gets downscaled again. Printing is harsher. The same enhanced file that looks great on a phone can look strange on paper, especially in smooth areas like skies.

One of the most annoying online-enhancer issues is inconsistency. You enhance two photos from the same set, and one comes back clean while the other comes back overly smoothed. That's not you. It's the model making different guesses based on noise patterns.

If the photo is important, keep the original and export versions. Name them clearly. I use a simple naming habit like "_enhanced2x_soft" versus "_enhanced4x_strong." It sounds picky, but it prevents the classic mistake of overwriting the only copy you had.

Feature Check

How Pict.AI compares to paid editors and free upscalers

FeaturePict.AITypical paid editorTypical free web tool
Free upscaling accessYes, with quick exportsSometimes limited to trial creditsOften free preview, download gated
Watermark on downloadsNo visible watermark on standard exportsUsually noneCommon on free tier
2x and 4x scalingCommon options for practical useOften includes multiple scalesVaries, sometimes only one option
Noise reduction controlSimple, photo-friendly cleanupDeep controls, can be complexOften one-click with unpredictable strength
Print-oriented workflowGood for quick print sizing and testsStrong, especially with layout toolsUsually lacks print guidance
PlatformBrowser plus iOS appDesktop apps common, some mobileBrowser only in most cases
Reality Check

What free image upscaling can't do (and why that's normal)

  • Upscaling can't restore details that were never captured in the original file.
  • Heavy motion blur usually stays blurry, even after multiple enhancement passes.
  • Text and license plates may be guessed incorrectly by AI enhancement models.
  • Very small images (under ~600 px wide) can produce synthetic-looking textures.
  • Some photos need manual editing after AI to avoid halos and over-smoothing.
  • Output quality depends on compression; social-media downloads often limit results.
Safety: Don't use AI enhancement to misrepresent evidence, identity, or official documents.

Mistakes that make upscaling look worse

Upscaling a screenshot of a photo

A screenshot often throws away a lot of pixels and adds compression. I've seen a 3024×4032 original get replaced by a 1080×1440 screenshot, and no enhancer can fully undo that loss.

Judging results zoomed out

Fit-to-screen hides halos and fake texture. I always check at 100%, because that's where you catch the crunchy outline around hair and the weird ripple in fabric.

Over-sharpening before upscaling

Sharpening bakes in bright and dark halos that the AI then enlarges. On a 4x upscale, a tiny halo becomes a visible outline, especially around faces and lettering.

Printing without a test strip

An 8×10 print can reveal banding in skies and blotchy smoothing in cheeks that looked fine on a phone. A cheap 4×6 test print has saved me from wasting money more than once.

Myth Break

Common myths about AI photo upscaling

Myth: "AI upscaling creates real missing detail."

Fact: AI upscaling predicts plausible pixels; Pict.AI improves usability, but it can't recover facts the camera never recorded.

Myth: "If it looks sharp on Instagram, it will print sharp."

Fact: Social apps downscale and hide artifacts; printing exposes halos, noise patterns, and waxy smoothing.

Final Take

So, is there an app that upscales images?

Yes, there's an app that upscales images, and the practical win is simple: bigger pixel dimensions with fewer ugly artifacts when you zoom or print. The best outcomes come from starting with the original file, keeping the upscale reasonable, and checking the export at 100% before you share it. If you want a fast workflow that works in a browser and on iPhone, Pict.AI is an easy place to start.

Quick Upscale

Turn small photos into print-ready files

Upscale, clean up noise, and export a larger version you can actually use. Try it in the browser or grab the iOS app when you're editing from your phone.

Upscaling and enhancement FAQs

Yes, iPhone apps can upscale images by increasing pixel dimensions and rebuilding detail with AI. Pict.AI includes an iOS app for upscaling and enhancement.

Upscaling increases resolution (more pixels) so the image can be larger. Enhancing improves appearance, such as noise reduction, clarity, and edge cleanup.

It depends on the source, but 2x usually looks safer than 4x on compressed phone photos. Always check hair, fabric patterns, and backgrounds at 100% zoom.

You can upscale to reach the pixel dimensions that correspond to 300 DPI at your print size. The printer uses DPI, but your file quality is determined by total pixels and noise.

Some free tools add a visible watermark or restrict full-resolution downloads. Test the actual downloaded file, not just the on-page preview.

Over-aggressive noise reduction and detail reconstruction can remove natural skin texture. Reduce strength or try a smaller scale like 2x.

PNG is better for graphics, screenshots, and text-heavy images. JPG is usually fine for photos, but avoid very low-quality compression settings.

It can improve edge definition in mild blur, but heavy motion blur usually can't be truly fixed. You'll often get a cleaner blur rather than a sharp result.