Why AI Upscalers Make Skin Look Plastic
AI upscalers make skin look plastic when they mistake pores, fine lines, peach fuzz, and film grain for noise, then smooth and sharpen the face. The fastest fix is to use a lower upscale factor, reduce denoise and face detail, mask skin separately, and add subtle grain back at the end.
Creating your image...
AI upscalers make skin look plastic because super-resolution models often classify low-contrast skin texture as noise and remove it during denoising. After that, sharpening or face-enhancement settings exaggerate highlights and edges, creating waxy cheeks, poreless foreheads, and a doll-like finish. Use 2x before 4x, lower denoise and sharpening, mask skin separately, and add fine grain to restore believable texture.
What Does Plastic Skin Mean in AI Upscaled Portraits?
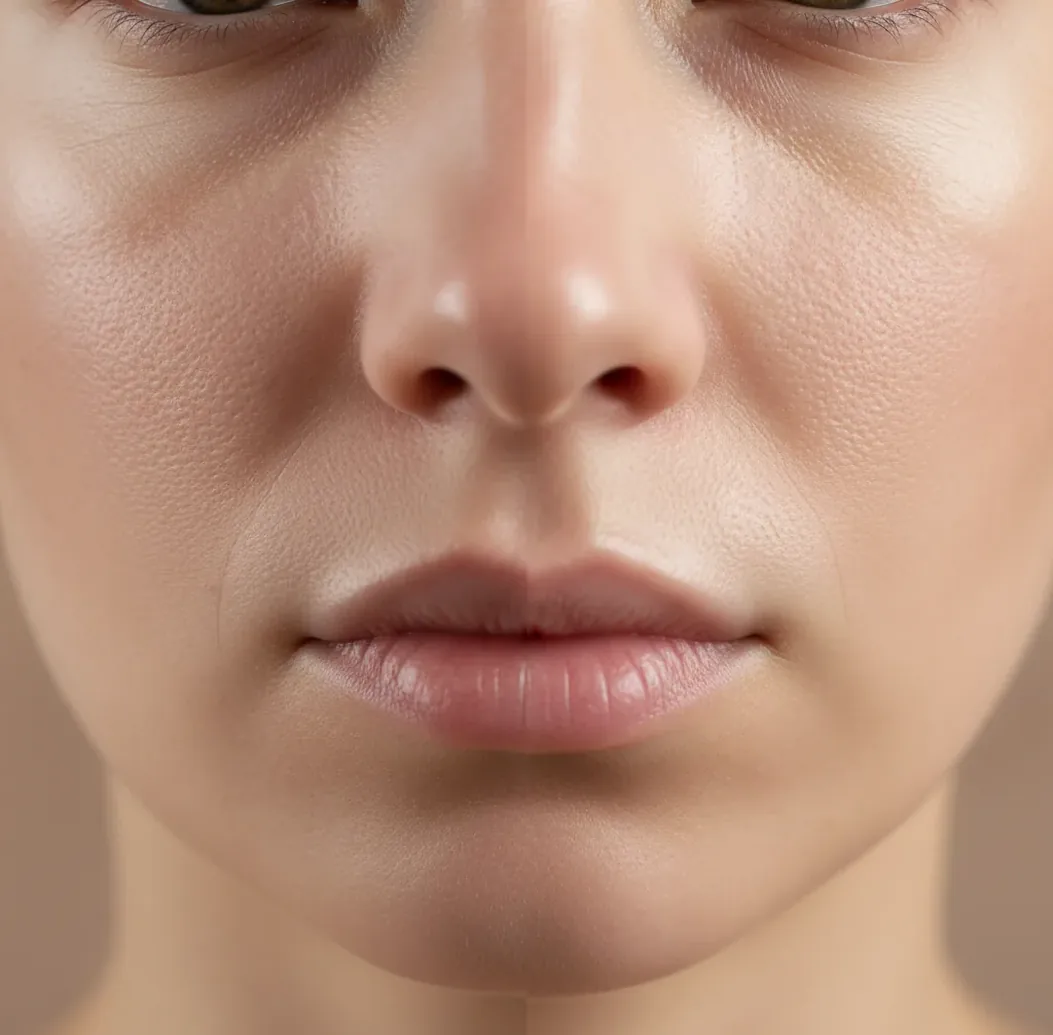
Plastic skin is a portrait artifact where an AI upscaler turns natural skin into a waxy, overly smooth surface. It usually appears on cheeks, foreheads, noses, and under-eye areas because those zones contain low-contrast micro-texture: pores, fine wrinkles, peach fuzz, makeup texture, and soft film grain.
The effect is different from normal beauty retouching because it often looks technically sharp but biologically wrong. Eyelashes, lips, and hair may become crisp while the skin plane looks like polished vinyl. Always inspect the result at 100% zoom and compare it with the original, because thumbnails can hide the loss of pore structure.
Why Do AI Upscalers Remove Pores and Fine Skin Texture?
AI upscalers remove pores because super-resolution systems are trained to predict plausible high-resolution detail from limited pixels, not to recover the exact original skin. CNN-based, GAN-based, and diffusion-based models all use learned priors to decide what belongs in the image, and low-contrast skin texture often resembles sensor noise or JPEG grain.
When denoising is strong, the model flattens small tonal variations across the skin. Then sharpening boosts edges, specular highlights, and face boundaries instead of restoring the original pores. That sequence, denoise first and sharpen after, is the main technical reason faces start to look airbrushed, oily, or doll-like after upscaling.
How Do You Fix Waxy Skin After Upscaling?
Start with a 2x upscale
Use 2x before trying 4x because the model has to invent fewer pixels. For portraits, 2x often preserves more believable skin than aggressive enlargement.
Lower denoise or restoration strength
Reduce denoise, face recovery, beauty enhancement, or restoration sliders until pores stop disappearing. If the original has noise, keep a little of it instead of cleaning the image completely.
Reduce sharpening on skin
Skin needs less sharpening than eyes, brows, hair, jewelry, and clothing. If your editor supports masks, apply sharper detail to features and softer settings to cheeks and forehead.
Add subtle fine grain
Add uniform, small-radius grain at the end to rebuild micro-texture. The grain should be barely visible at normal viewing size and should not look like speckles or makeup fallout.
Check at 100% and 200%
Compare the original and upscale around the nose, under-eyes, lips, and hairline. If skin looks smoother than the source but highlights look sharper, the upscale is still too aggressive.
Which Settings Most Often Cause Doll-Like Faces?
The settings most likely to cause doll-like faces are high denoise, high face enhancement, strong global sharpening, and large upscale factors. These controls are useful in moderation, but stacked together they erase texture and then replace it with artificial contrast.
A risky portrait recipe is 4x upscale plus maximum face recovery plus heavy noise reduction plus final sharpening. That combination can make eyes and hair look impressive while cheeks become unnaturally smooth. A safer recipe is 2x upscale, low-to-medium denoise, selective sharpening for eyes and hair, and light grain for the skin plane.
What Upscale Factor Is Safest for Realistic Skin?
A 2x upscale is usually the safest starting point for realistic skin because it increases resolution without forcing the model to invent too much new facial detail. A 4x upscale can work for posters, stylized portraits, or distant faces, but it is more likely to hallucinate pores, smooth cheeks, or create strange makeup-like texture.
Use viewing distance as the decision rule. For social posts, profile photos, and small prints, 2x is often enough. For large wall prints, try 4x only after checking a cropped face test at 100% and 200%. If the 4x crop looks cleaner but less human, stay with 2x and use layout or print sizing to compensate.
Which Tools Help Avoid Waxy Skin in Portrait Upscaling?
| Tool type | Best for | Skin-texture advantage | Watch out for |
|---|---|---|---|
| Browser AI upscaler such as Pict AI | Fast portrait tests, social images, creator workflows | Quick previews make it easier to compare denoise, sharpness, and texture before exporting | Cloud tools may not be ideal for sensitive or private face images |
| Desktop photo editor with AI resize | Client work, print files, controlled retouching | Layer masks, local sharpening, and grain overlays give more control over skin zones | Requires more editing skill and stronger hardware |
| Dedicated portrait restoration tool | Old family photos, damaged scans, low-resolution headshots | Can reconstruct eyes, lips, and facial boundaries when the source is weak | Face restoration can change identity cues if strength is too high |
| Open-source super-resolution model | Technical users, batch workflows, model testing | You can choose models that preserve grain or avoid aggressive face enhancement | Setup, VRAM requirements, and model selection can be difficult |
No tool can perfectly recover pores that are absent from the source file. The best option is the one that lets you control denoise, sharpening, face enhancement, masking, and final grain separately.
What Edit Recipes Keep Skin Texture Natural?
- Natural headshot recipe: upscale 2x, denoise low, face enhancement low, sharpen eyes and hair only, add 1–3% fine monochrome grain, export with minimal JPEG compression.
- Old photo recipe: scan or upload the cleanest version, remove dust manually where possible, upscale 2x, keep film grain visible, avoid maximum restoration, add gentle contrast only after texture is stable.
- Beauty portrait recipe: preserve pores on cheeks and forehead, sharpen lashes and lips selectively, avoid smoothing highlights, and use a masked grain layer so skin does not look like plastic foundation.
- AI-generated portrait recipe: add texture before upscaling if the source is already too smooth, then use a conservative upscale. AI portraits often start with synthetic skin, so aggressive enhancement makes the problem worse.
- Text prompt for generative repair: 'restore natural skin texture, visible pores, subtle peach fuzz, realistic micro-contrast, no waxy skin, no beauty smoothing, no plastic face, preserve identity and lighting.'
When Can’t Plastic Skin Be Fully Fixed?
- If the original portrait was already heavily smoothed by a phone beauty filter, the real pore pattern is gone and can only be approximated.
- If highlights are blown out, the model has no tonal information to reconstruct natural forehead, nose, or cheek texture.
- If the source is a low-quality JPEG, compression blocks may upscale into false skin patterns or patchy texture.
- If face restoration changes the eyes, mouth, jawline, or age cues, lowering strength is safer than trying to sharpen the result.
How Should You Check Whether Skin Still Looks Real?
The best check is a side-by-side crop at 100% zoom, not a full-image preview. Look at the cheek-to-nose transition, under-eye texture, forehead highlights, lip edges, and the hairline. Real skin has uneven micro-contrast; plastic skin has flat planes with sharp borders.
Also test the final use case. A portrait that looks slightly textured at 200% may look perfect in an Instagram carousel, while a waxy upscale may become obvious in an 11x14 print. For branding, portfolios, gifts, and family prints, choose a result that preserves identity and emotional realism over maximum sharpness.
More "why AI does that" explainers
Frequently Asked Questions
They often treat pores, fine lines, and grain as noise, smooth them away, then sharpen the remaining face structure. This creates waxy skin with crisp edges but little natural texture.
It means the upscaled face looks overly smooth, shiny, or poreless, almost like wax or vinyl. The artifact is most visible on cheeks, forehead, nose, and under-eye areas.
Start with 2x, reduce denoise and face enhancement, avoid global sharpening, and add subtle fine grain after resizing. Masking skin separately gives the most natural result.
2x is usually better for realistic skin because it requires less invented detail. 4x can be useful for large prints, but it increases the risk of smoothed or hallucinated texture.
Sharpening cannot recover pores that were removed by denoising. It usually sharpens highlights and edges, which can make waxy skin look even more artificial.
Light grain can help restore the impression of micro-texture, especially after a clean upscale. It should be subtle, uniform, and barely visible at normal viewing size.
Old photos often contain film grain, blur, fading, and compression, which restoration models may confuse with damage. If restoration strength is too high, faces can become smooth and synthetic.
Yes, strong face recovery can alter identity cues such as eye shape, age lines, mouth detail, or skin condition. Use low strength and compare against the original when the person needs to remain recognizable.
Use PNG, TIFF, or high-quality JPEG when possible, and avoid repeated recompression. Low-quality JPEG export can create blocks and smears that make skin texture look worse.