Pict.AI vs YouCam Perfect: 2026 AI Photo Editor Comparison
This comparison is about choosing the better AI photo editor for portraits, cleanup, background changes, and quick social exports. The browser-first editor is stronger for lightweight, natural edits and fast web workflows, while YouCam Perfect is stronger for selfie beautification, makeup effects, and filter-heavy portrait styling.
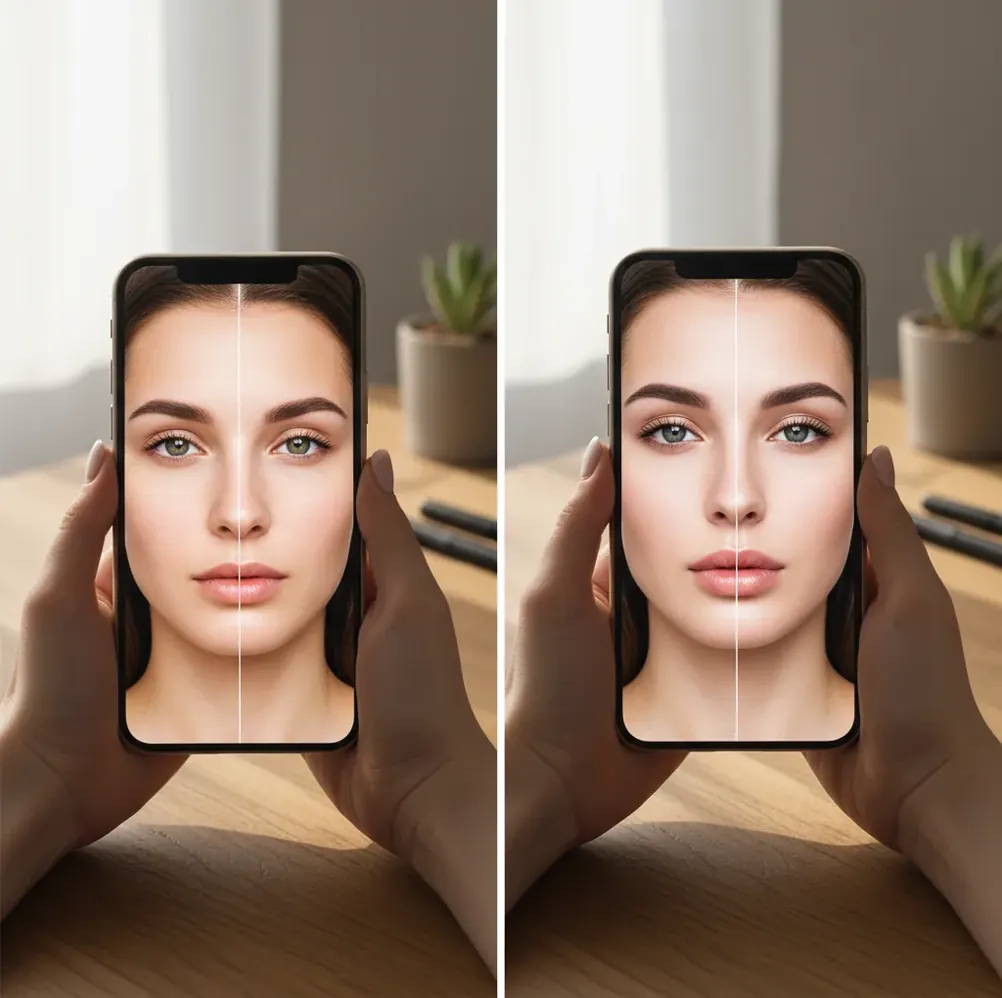
Creating your image...
Pict.AI vs YouCam Perfect comes down to editing style: choose the browser-first AI editor for quick cleanup, natural-looking retouching, and background edits, and choose YouCam Perfect for beauty filters, makeup tools, and stronger selfie retouch controls. For the fairest test, edit the same photo in both apps, export at the same resolution, and inspect hair, skin texture, glasses, and background edges at 200% zoom.
What Is the Difference Between These Two AI Photo Editors?
The main difference is editing intent: one workflow is built around fast AI image cleanup and browser-based generation, while YouCam Perfect is built around mobile portrait beautification. Both can retouch faces, adjust backgrounds, remove distractions, and prepare images for social posts, but they usually produce different visual signatures.
A natural-edit workflow tries to preserve pores, skin tone variation, flyaway hair, and original facial geometry. A beauty-edit workflow often prioritizes smoother skin, brighter eyes, reshaped contours, makeup overlays, and a more polished selfie look. Neither is automatically better; the right choice depends on whether the image is for a profile photo, dating app, brand headshot, gift print, product post, or casual story.
How Do AI Retouching and Background Edits Actually Work?
AI photo editors usually combine semantic segmentation, face detection, enhancement models, and generative inpainting. Segmentation creates masks for skin, hair, body, clothing, and background; face detection locates eyes, nose, mouth, jawline, and expression points; enhancement models then smooth, sharpen, relight, or recolor selected regions.
The difference in output comes from model strength and default assumptions. Heavy denoising can make cheeks look plastic because pores and micro-shadows are treated as noise. Background replacement can fail when the mask cuts through wispy hair, transparent glasses, lace, smoke, or reflective objects. Object removal is usually easiest on plain walls, skies, tables, or grass, and hardest on repeated patterns like fences, brick, knit fabric, and printed text.
How Do You Test Both Editors Fairly in 7 Minutes?
Choose one difficult photo
Use a portrait with hair wisps, skin texture, glasses or jewelry, and a busy background. Easy images hide weaknesses, so test with the kind of photo you actually need to publish.
Match the starting file
Upload the same original image to both editors. Avoid screenshots, compressed messenger downloads, or resized copies because lower resolution can make an edit look cleaner than it really is.
Apply one light retouch pass
Use the smallest retouch strength that visibly improves the image. Do not compare a subtle edit in one app against a full beauty preset in the other.
Run one identical background or cleanup task
Remove the same object, replace the same background, or clean the same distraction. This reveals mask quality, inpainting behavior, shadow handling, and edge artifacts.
Export at the same resolution
Save both files with the closest matching size and quality settings available. If one export is smaller, it may hide pores, edge halos, and texture problems.
Inspect at 200% zoom
Check hairline, nostrils, jaw edge, glasses frames, teeth, fingers, and background seams. Decide based on artifacts and realism, not the first thumbnail preview.
Which Editor Is Better for Selfies, Cleanup, Backgrounds, and Exports?
| Use case | Browser-first AI editor | YouCam Perfect | Other useful options |
|---|---|---|---|
| Natural portrait retouching | Better fit when you want lighter edits, preserved texture, and a less filtered face. | Better fit when you want obvious smoothing, makeup effects, reshaping, and glam presets. | Snapseed and Lightroom Mobile are useful for manual exposure and color control. |
| Quick selfie beautification | Works for simple cleanup, but the style is less beauty-filter centered. | Strong fit because its toolset is designed around selfies, skin, makeup, and face styling. | Facetune is another portrait-focused option for detailed beauty adjustments. |
| Object removal | Good for simple distractions, plain backgrounds, small clutter, and fast cleanup. | Useful for casual cleanup, especially when the surrounding area is not too complex. | Photoshop Express and Google Photos can also handle basic object removal. |
| Background replacement | Good for profile photos, social graphics, product-style shots, and clean backdrops. | Useful for mobile-friendly portrait backgrounds and stylized selfie scenes. | Canva is useful when the final image also needs text, layout, or brand templates. |
| Fast web workflow | Stronger fit if you want to start editing in a browser without a full app-first setup. | Stronger fit if your editing happens mainly inside a mobile beauty app workflow. | Adobe Express is useful for browser-based social assets and quick design exports. |
| Print or portfolio use | Best only if the export keeps enough resolution and skin texture survives close inspection. | Best when the retouch level is reduced and the face still looks consistent across images. | Lightroom, Capture One, and Photoshop remain stronger for professional print finishing. |
For creator work, the best editor is the one that keeps the image believable at final size. A tool that looks excellent in a phone preview may still fail on a 4x6 print, LinkedIn headshot, product listing, or portfolio crop.
Which One Should You Choose in 2026?
Choose the browser-first workflow if your priority is fast image cleanup, natural portrait fixes, simple AI generation, background changes, and social-ready exports without a heavy beauty-edit look. It is especially practical for creators who move between desktop browsing, iPhone edits, profile photos, product posts, and quick visual experiments.
Choose YouCam Perfect if your priority is selfie polish, beauty filters, makeup looks, face-shape controls, and mobile-first portrait editing. It is a better fit when the desired result is clearly enhanced rather than documentary-real. If you create content for dating profiles, personal branding, influencer posts, or polished stories, test both styles against your own face because identity consistency matters more than feature count.
What Prompt Recipes Help Create Natural Photo Edits?
- Natural headshot cleanup: Retouch this portrait subtly. Preserve skin texture, freckles, hair strands, face shape, and natural shadows. Remove minor blemishes only and keep the result realistic.
- Clean background swap: Replace the cluttered indoor background with a soft neutral studio backdrop. Keep the original lighting direction, hair edges, shoulders, and clothing texture intact.
- Product-style portrait: Improve exposure and contrast for a professional profile photo. Keep the face recognizable, avoid plastic skin, and maintain realistic eye highlights.
- Object removal: Remove the distracting object in the background and reconstruct the wall, floor, or landscape behind it. Match the surrounding texture, perspective, and light.
- Social crop variation: Create a clean 1:1 profile crop and a 9:16 story version. Keep the subject centered, avoid cutting off hair or hands, and leave space for text if needed.
What Workflow Works Best for Creators?
Define the final use
Decide whether the image is for a profile photo, story, thumbnail, gift print, product listing, portfolio, or brand kit. The final use determines how much retouching is acceptable.
Fix exposure before beauty edits
Correct brightness, white balance, and contrast first. Retouching a poorly lit photo often creates muddy skin, gray shadows, or over-smoothed highlights.
Retouch in small passes
Use multiple subtle edits instead of one aggressive preset. This keeps skin texture, hair detail, and facial identity more stable across a set of images.
Export multiple aspect ratios
Save 1:1 for profile images, 4:5 for feed posts, 9:16 for stories and reels, and the highest-resolution version for prints or future reuse.
Check consistency across a set
If you are editing a carousel, portfolio page, or brand profile, compare all images together. Skin tone, eye brightness, background color, and face shape should feel consistent.
What Limitations Should You Watch For?
- Heavy skin smoothing can erase pores, flatten cheek shadows, and create a plastic face texture.
- Hair wisps, curls, eyelashes, glasses frames, earrings, and lace are common mask failure zones.
- Background replacement can leave halos around shoulders, hair, fingers, and transparent objects.
- Low-light selfies are harder because sensor noise may be smoothed before the face is enhanced.
More Pict.AI comparisons people ask for
Frequently Asked Questions
The better choice is the editor that preserves pores, facial geometry, hair edges, and skin tone at 200% zoom. Use light retouch settings and avoid full beauty presets if realism matters.
A selfie-first beauty app is usually better for makeup effects, face reshaping, skin smoothing, and stylized portrait filters. It is the stronger choice when you want a polished or glam look.
Yes, they can remove simple objects on plain backgrounds, but they often struggle with fences, curls, text, reflections, and complex patterns. A second pass or tighter crop can improve the result.
Use the same original photo, apply equivalent edits, export at the same resolution, and inspect both images at 200% zoom. Check hair, nostrils, glasses, fingers, and background seams.
The best option depends on mask quality around hair, shoulders, and transparent objects. For clean profile photos, test a plain studio-style background and inspect edge halos before posting.
They can if smoothing, reshaping, or eye enhancement is too strong. Keeping edits subtle and preserving original skin texture makes the image feel more believable.
Use 1:1 for profile images, 4:5 for feed posts, and 9:16 for stories or reels. Keep the highest-resolution export as an archive in case you need future crops or prints.
They can work for casual profile photos and social headshots, but professional use needs careful checking for skin texture, color accuracy, sharpness, and identity consistency.
A browser editor is convenient for fast desktop access and quick experiments, while a mobile app is better when your photos and posting workflow are already on your phone.